
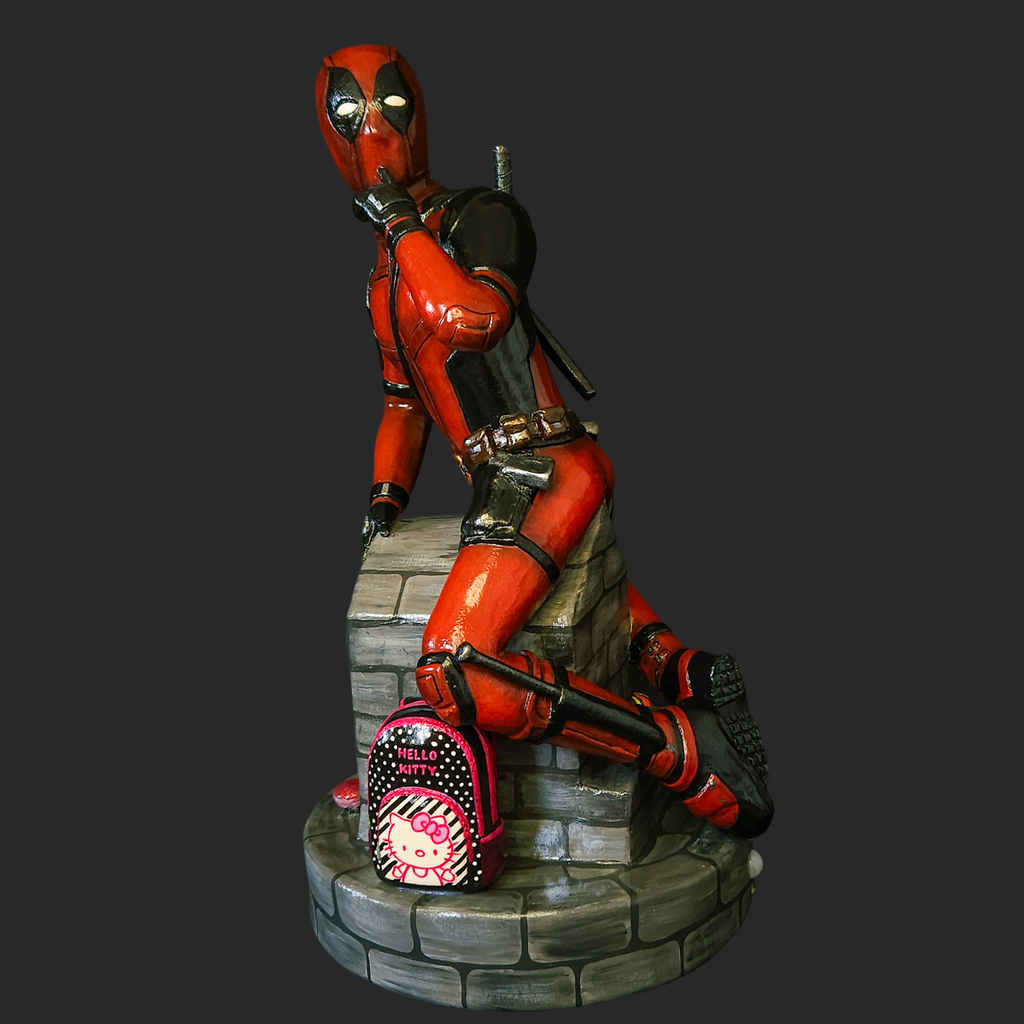
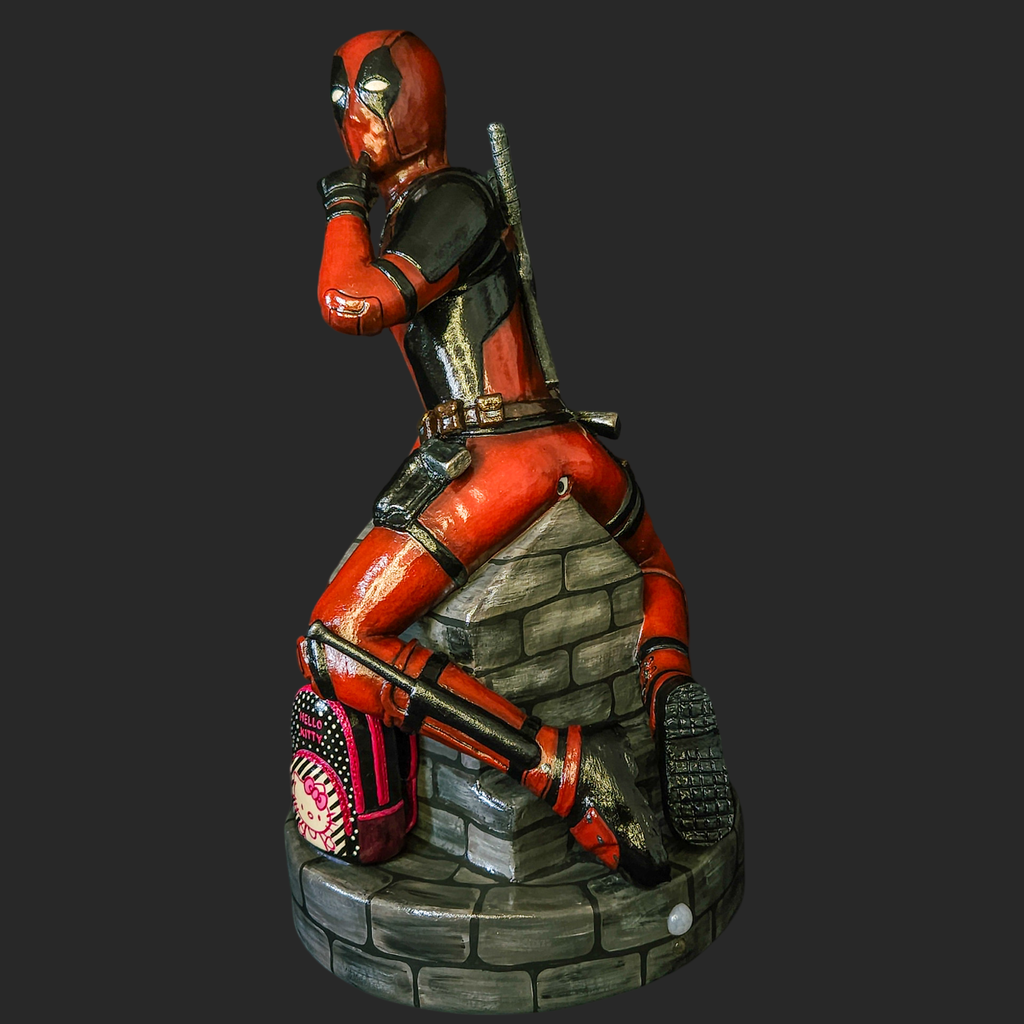
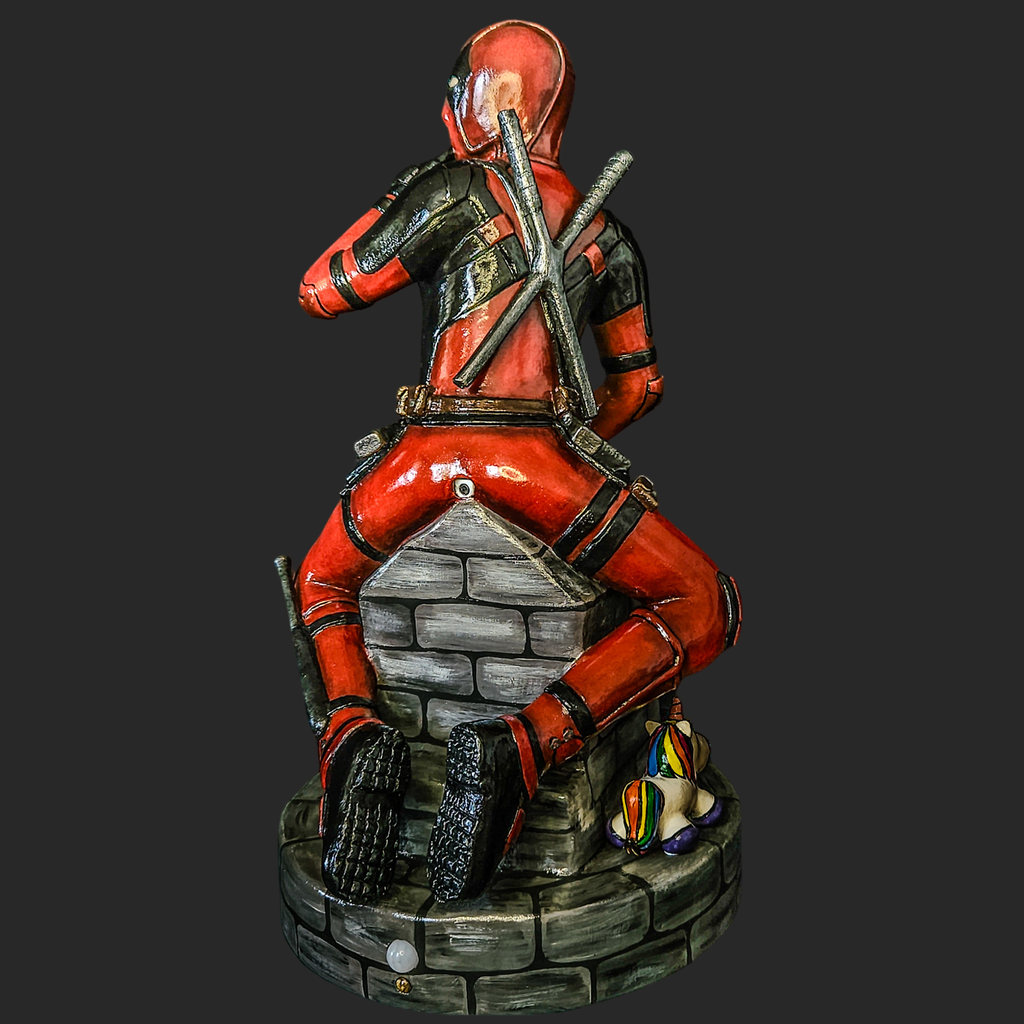
Deadpool Air Freshener

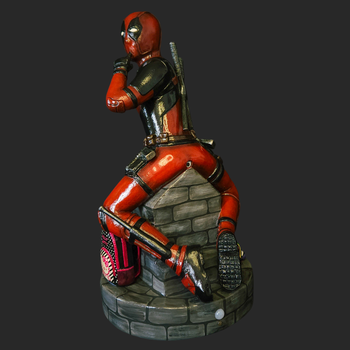
You know that feeling when a movie leaves such an impression that you just have to create something in its honour? That’s exactly what happened to me after watching Deadpool 2. I couldn’t shake off this strange urge to make a mini statue of the Merc with a Mouth. But here’s the thing—I’m not a fan of making things that just sit around collecting dust. So, I thought, “What could I do with a tiny Deadpool that’s both funny and practical?” Then it hit me: Deadpool is all about mischief, so why not turn him into a farting air freshener?
I started this project back in 2019, but life got in the way, and it ended up on the shelf—literally and figuratively. Fast forward to the release of Deadpool 3, and I knew it was time to dust off the idea and bring Deadpool to life.
Initially, the plan was simple: sculpt Deadpool from clay, stick in a store-bought air freshener, maybe extend a few wires for convenience, and call it a day. But as I worked on it, the project started feeling, well, a bit too straightforward. So, I decided to shake things up, adding some twists and turns along the way.
Supplies
Below is a list of tools, materials, and electronic bits that I ended up using. I might have forgotten something important—like my sanity—but this should cover most of it.
Tools:
- Drill Bits
- Scissors
- Hobby Knife
- Hot Glue Gun
- Clay Modelling Tools
- Silicone Rolling Pin
- Brushes
- Metal Ruler
- Small Files
- Airbrush (Optional)
- Soldering Iron
Materials:
- Glade Sense & Spray
- Air Freshener
- L-Shaped Aerosol
- Nozzle From An Old
- Air Freshener
- Heat Shrink
- Glue Stick
- Cardboard
- Wooden Skewers
- Aluminium Tape
- Air-Drying Clay
- Acrylic Paint
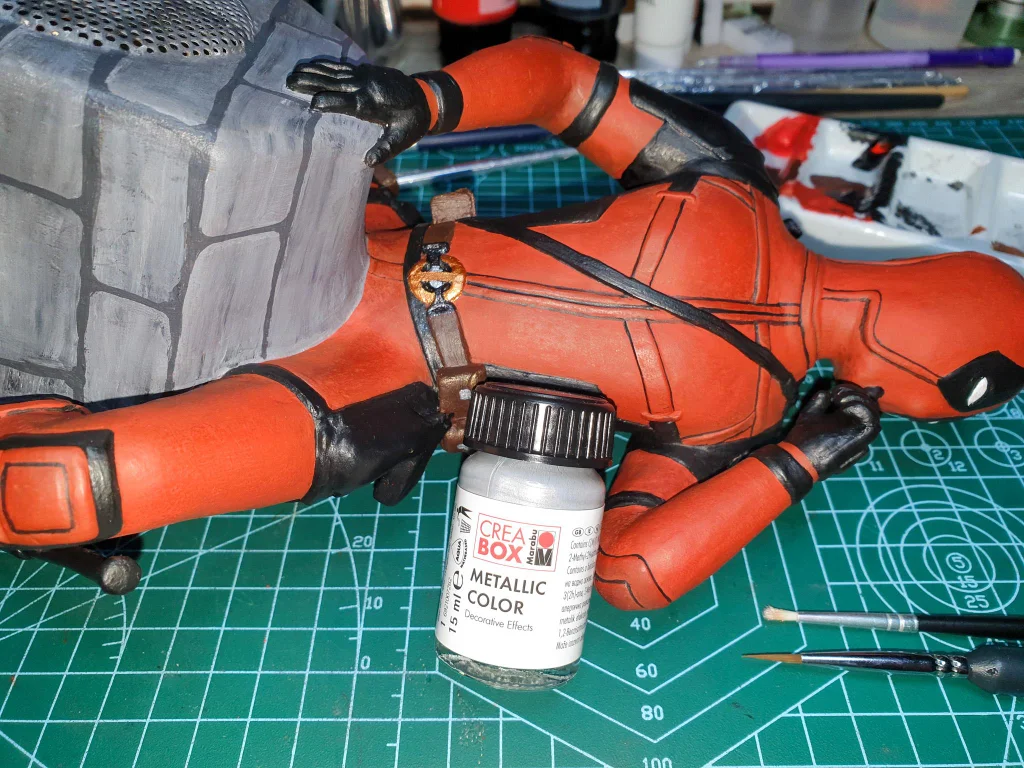
- Metallic Colour
- Thin Ribbon
- Black Eyeshadow
- Hobby & Craft Sealer
- Elastic Band
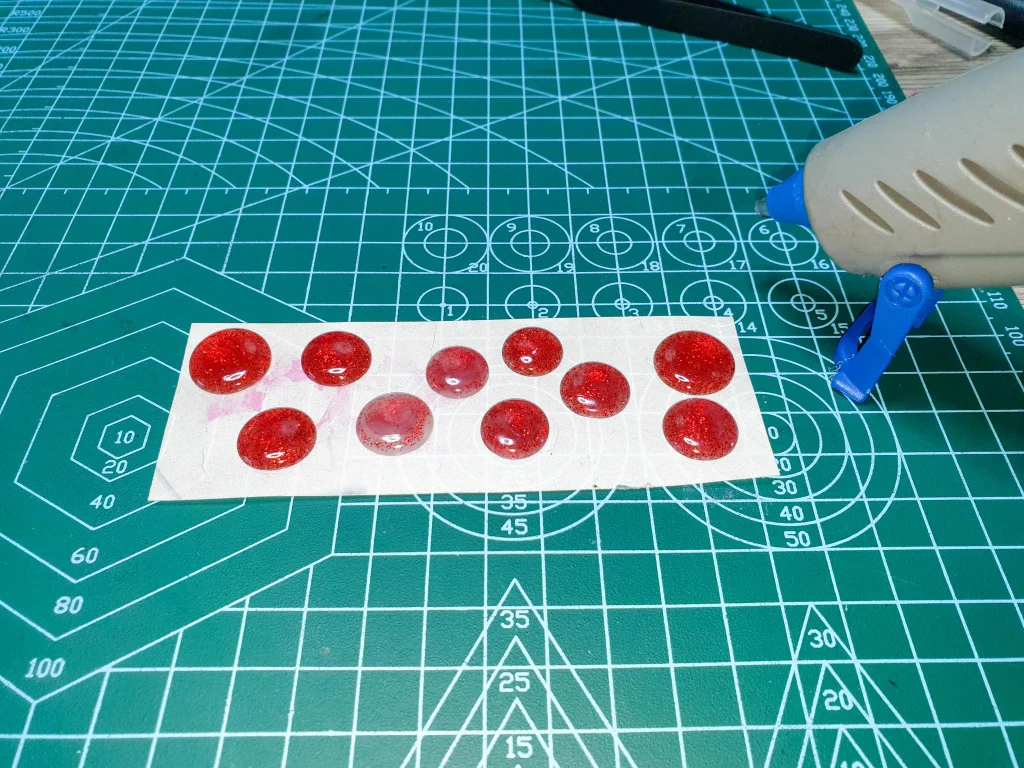
- Glittery Red Hot Glue
Electronics:
- Wires
- Electrical tape
- Toggle Switch
- Push Button
- Arduino Nano
- Prototype Board
- Speaker
- Speaker Cover
- LED
- PIR Sensor
- HW-166 Motor Drive
- DFPlayer Mini
- Mini SD Card
- BS170 N Channel
- MOSFET
- 1KΩ Resistor x2
- 10KΩ Resistor
- 1KΩ Potentiometer
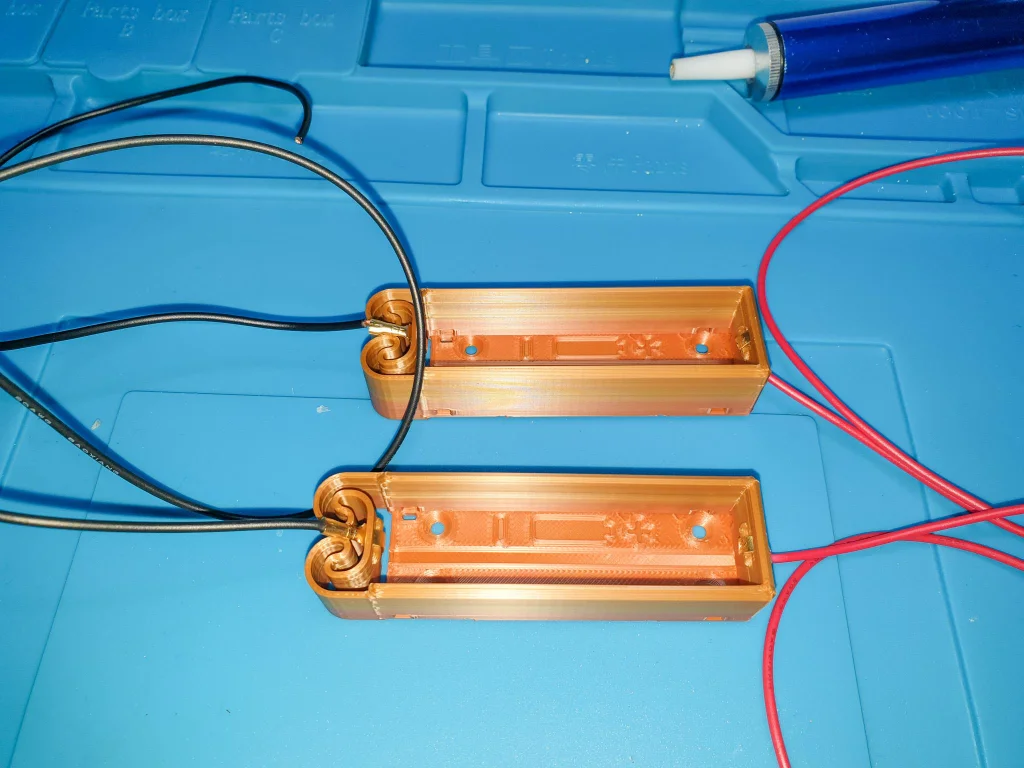
- 2x 18650 Batteries
- 2S 7.4V 18650 Battery
- Protection Board
- 2x 18650 Single
- Battery Holder
- Small Push Button
Step 1: Air Freshener Mod


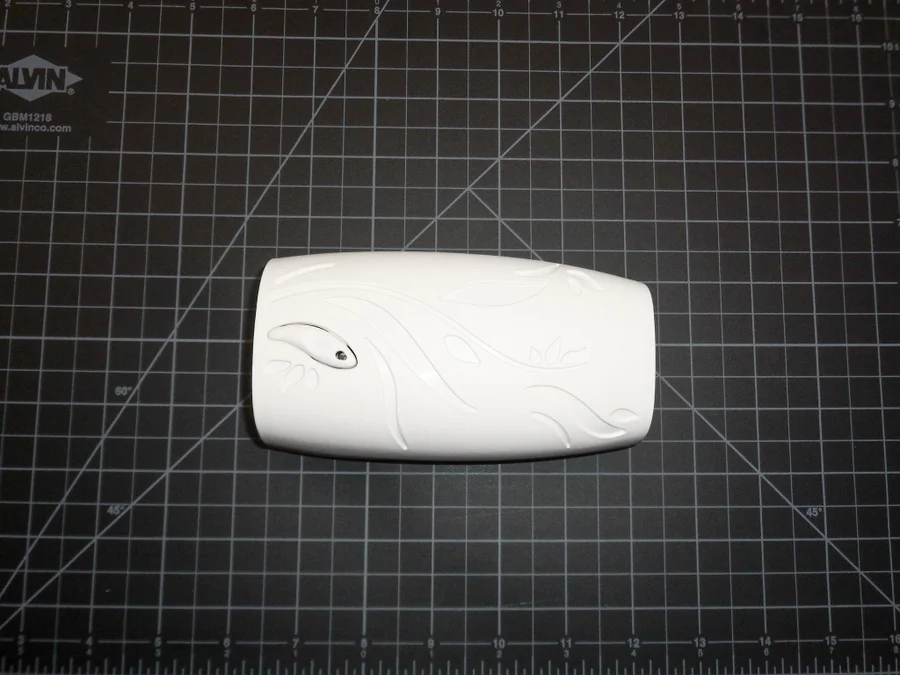
Choosing the right air freshener for this project was a bit of a hunt, but I ultimately settled on Glade Sense & Spray (something like this one). It’s small, compact, and perfect for our little Deadpool. But honestly, any air freshener will do, as long as you’re willing to make a few modifications to fit it into Deadpool’s base.
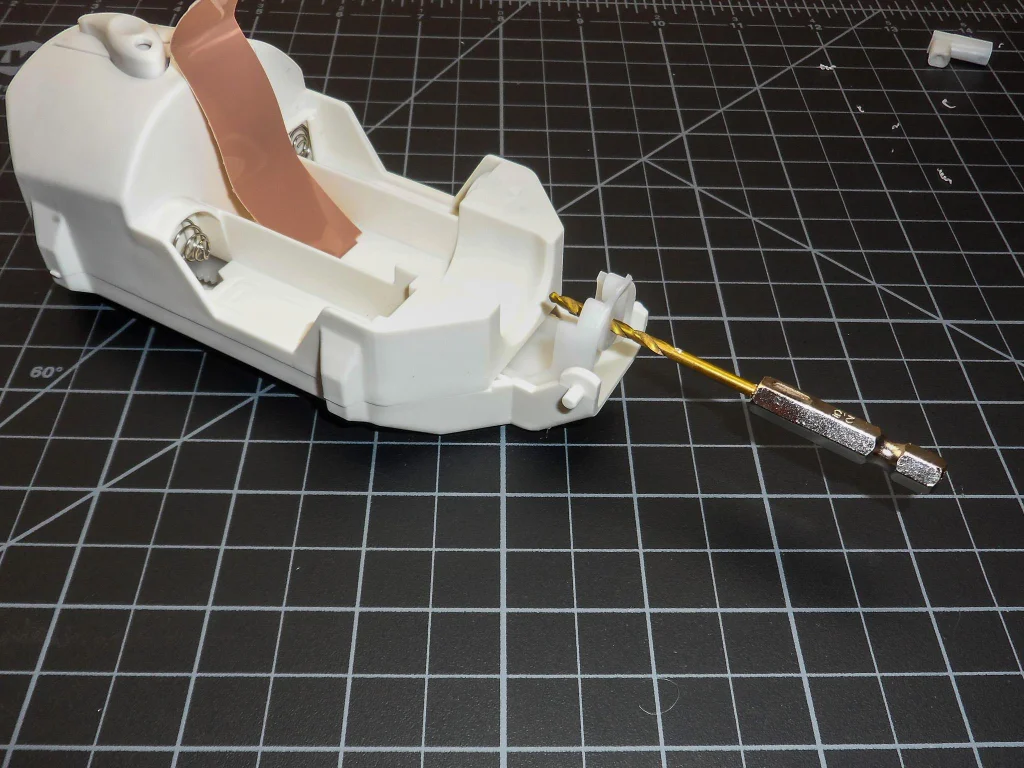
First things first, I removed the top cover of the air freshener—it’s not going to be needed anymore. This particular air freshener was designed to spray upwards, but for our purposes, I needed it to spray forward. So, I grabbed a drill bit and made the spray hole a bit larger.
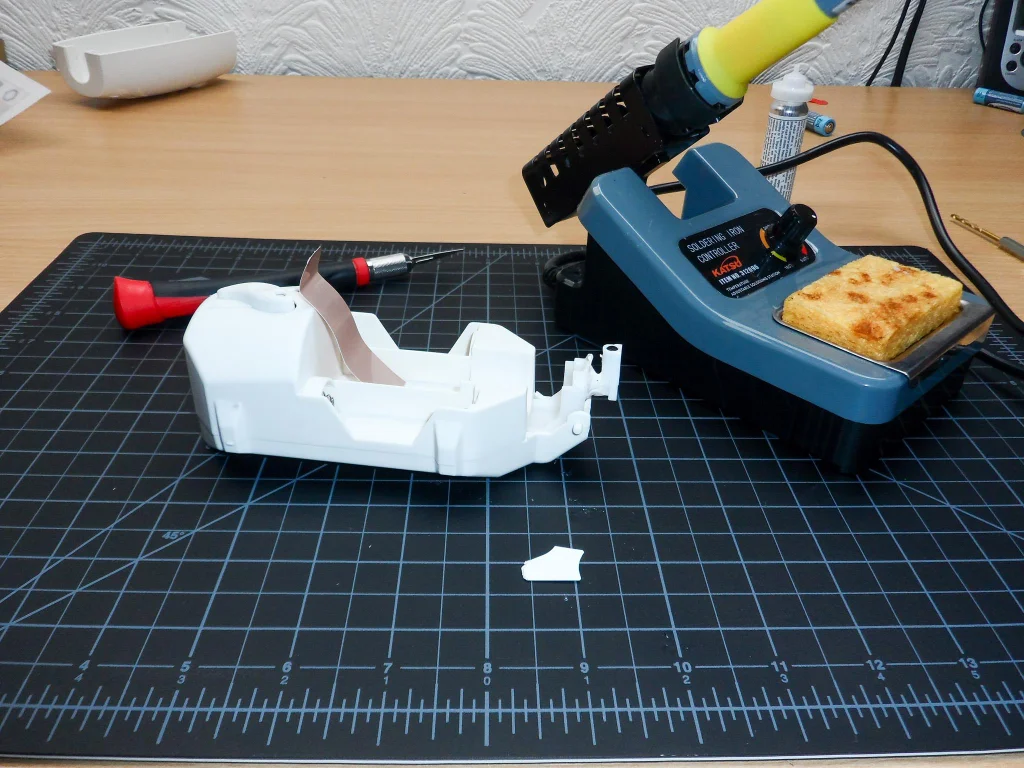
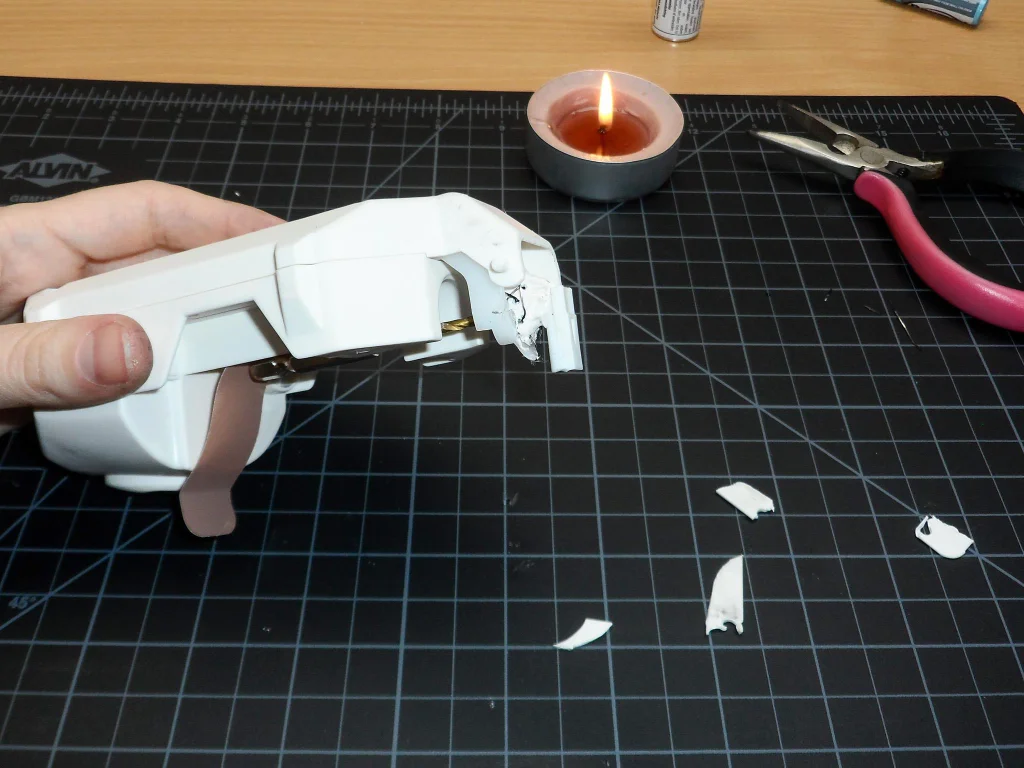
I scavenged an L-shaped aerosol nozzle from an old, larger air freshener and decided it would be perfect for redirecting the spray. I cut off a piece of the top cover and plastic welded the new nozzle on top of the original one. If “plastic welding” sounds fancy, don’t worry—it’s just a fancy way of saying I stuck the two together with a soldering iron and determination.
But, being the cautious type (at least when it comes to things potentially falling apart), I was a bit worried that the new nozzle might dislodge at some point. So, I heated up a few staples over a candle and poked them through both pieces for added support.
With the nozzle securely in place, I added a little more plastic on top, just for good measure. Then, to finish off, I put a piece of heat shrink over the newly added nozzle. This helped me better visualise where the spray hole should be.
Step 2: All About That Base


Step 3: From Spidey to Deadpool


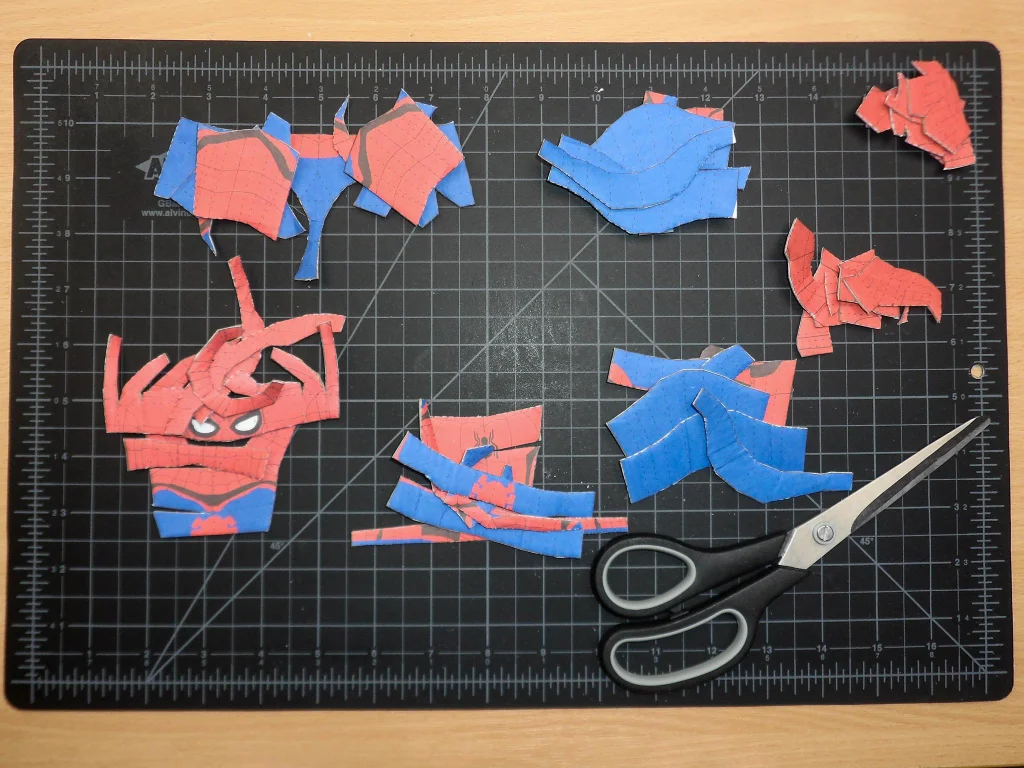
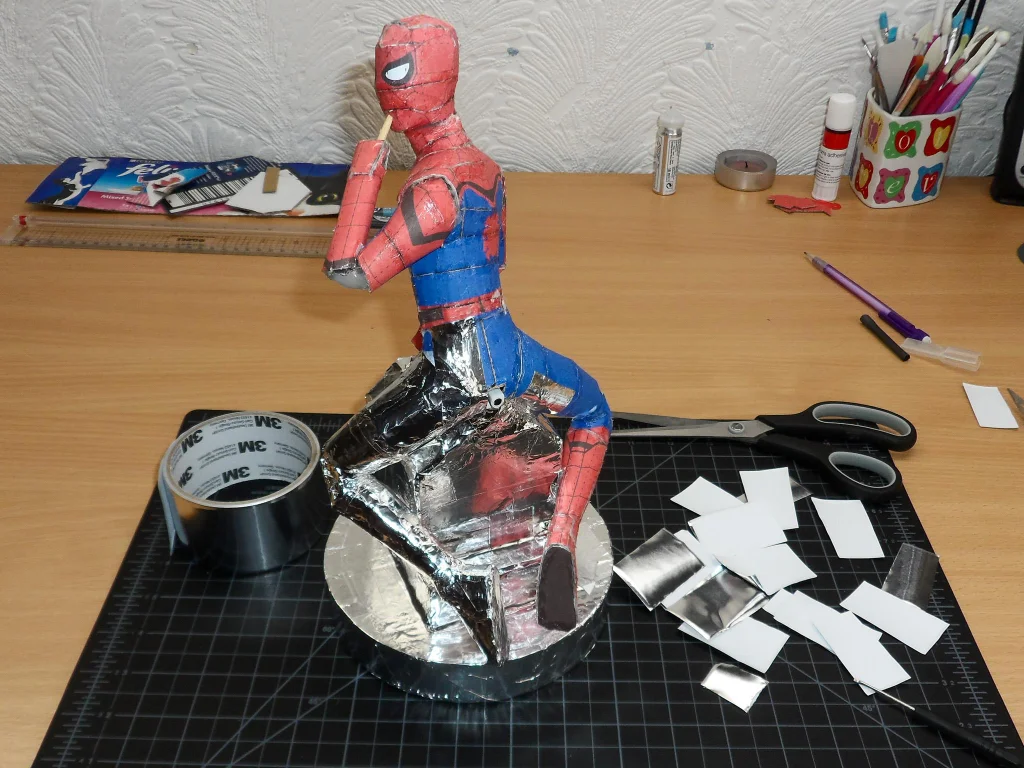
Sculpting isn’t exactly my superpower, so I decided to get a little creative by finding a shortcut. Instead of painstakingly sculpting Deadpool from scratch, I figured, why not start with something a little easier to work with? That’s when I stumbled upon a paper figure of Spider-Man online.
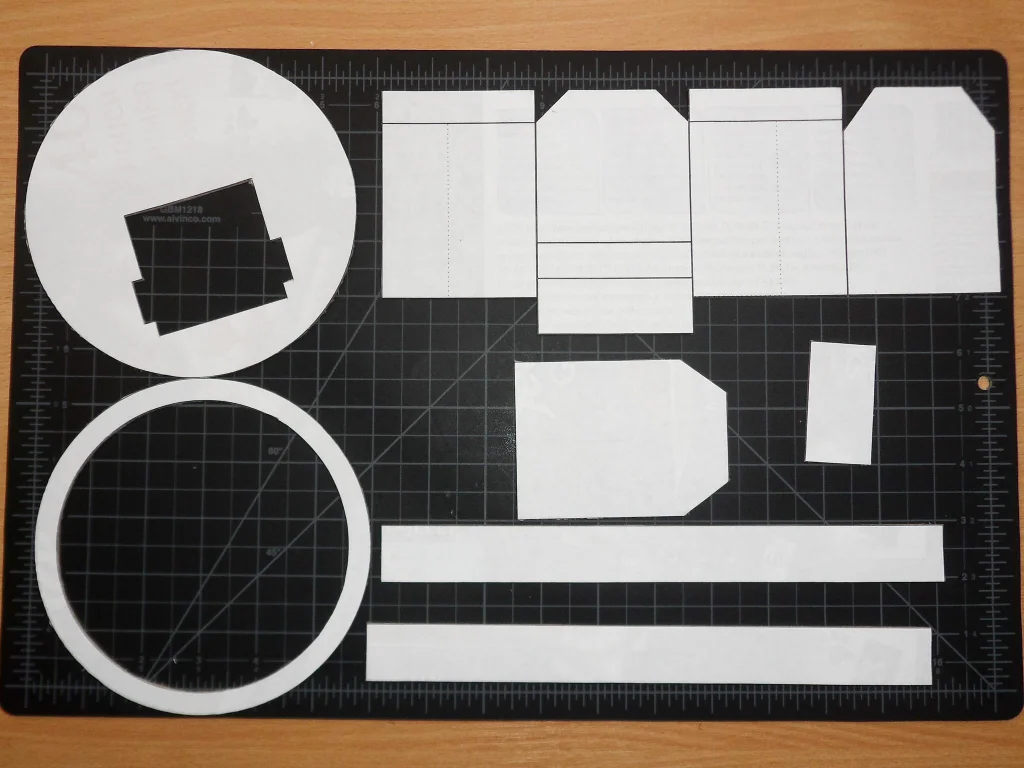
I found the perfect paper model, scaled it up to fit the proportions I needed, and then printed it out. If you’re curious, here’s the link to the original Spidey model. The beauty of this approach is that it saved me tonnes of time and effort, plus it gave me a solid foundation to work from.
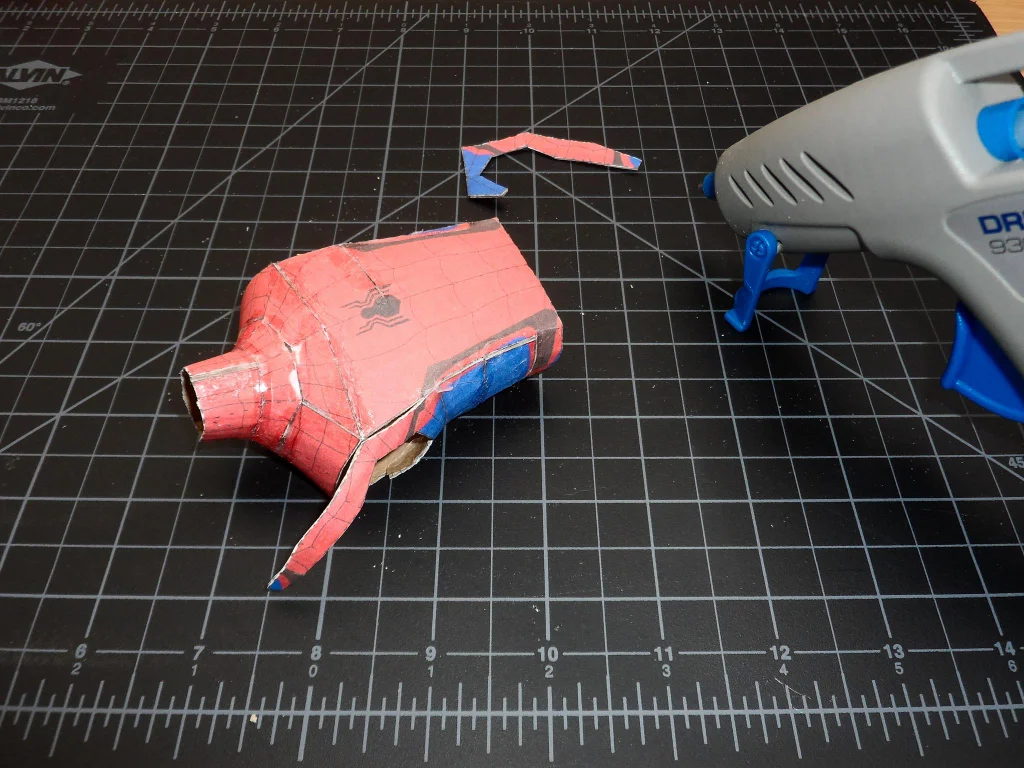
Once I had the scaled-up Spider-Man printed, I used a glue stick to attach the templates to more cardboard. This would give the paper figure the rigidity needed to support the clay I’d be adding later. Then, armed with a trusty pair of scissors, I cut out all the pieces: the head, torso, bottom, hands, and legs.
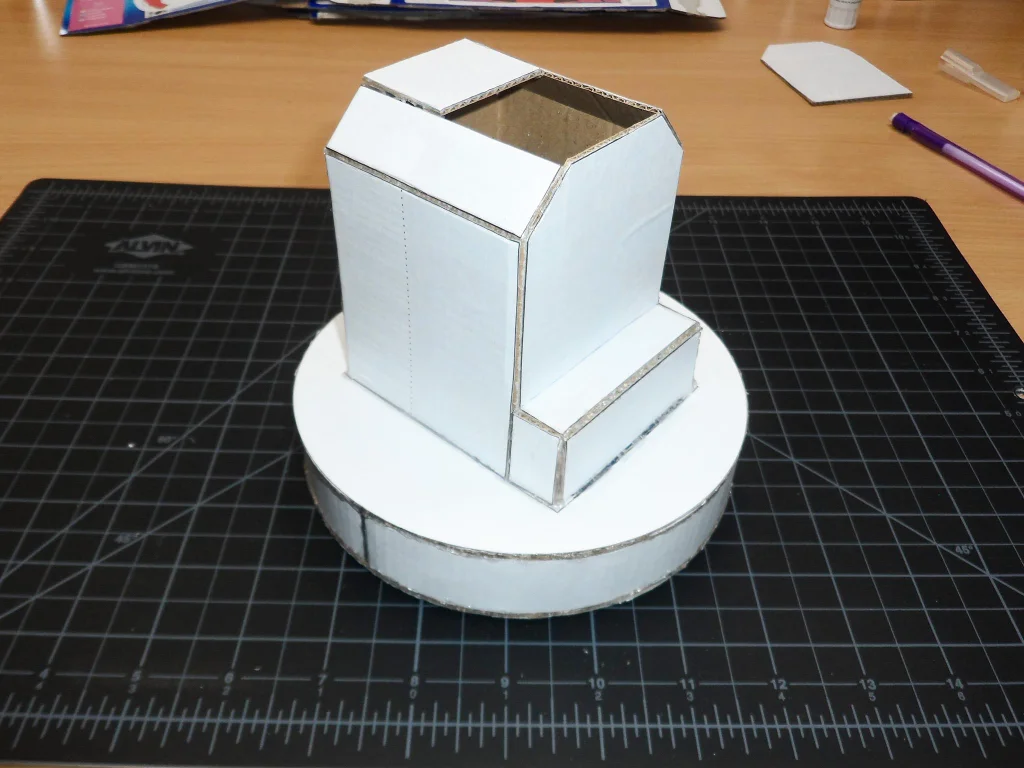
With everything cut out, I started assembling the pieces, glueing together the head, torso, bottom, hands, and legs. However, I kept these parts separated for now, as it would be easier to work on them individually before bringing everything together. This method allowed me to bypass my lack of sculpting skills while still creating a solid base for the project.
Step 4: Piecing It Together


With the base ready and the air freshener primed for action, it was time to start assembling Deadpool’s body—one piece at a time. This step was a bit like putting together a puzzle where the pieces don’t quite fit the first time around, but with a little patience and a lot of glue, it all came together.
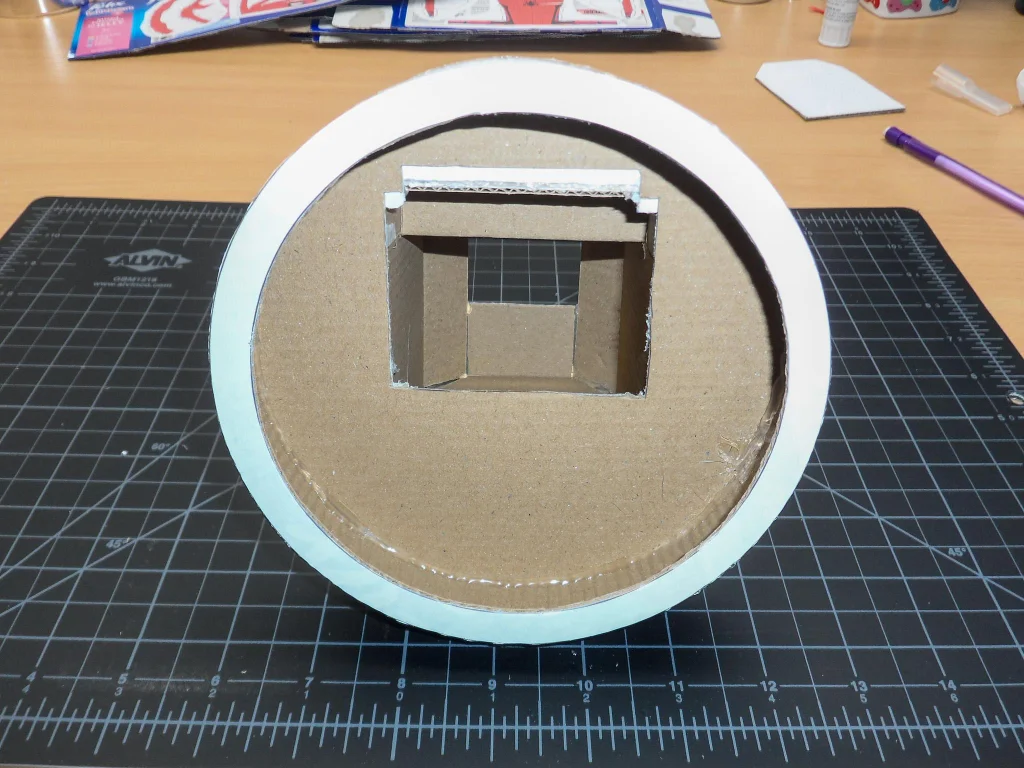
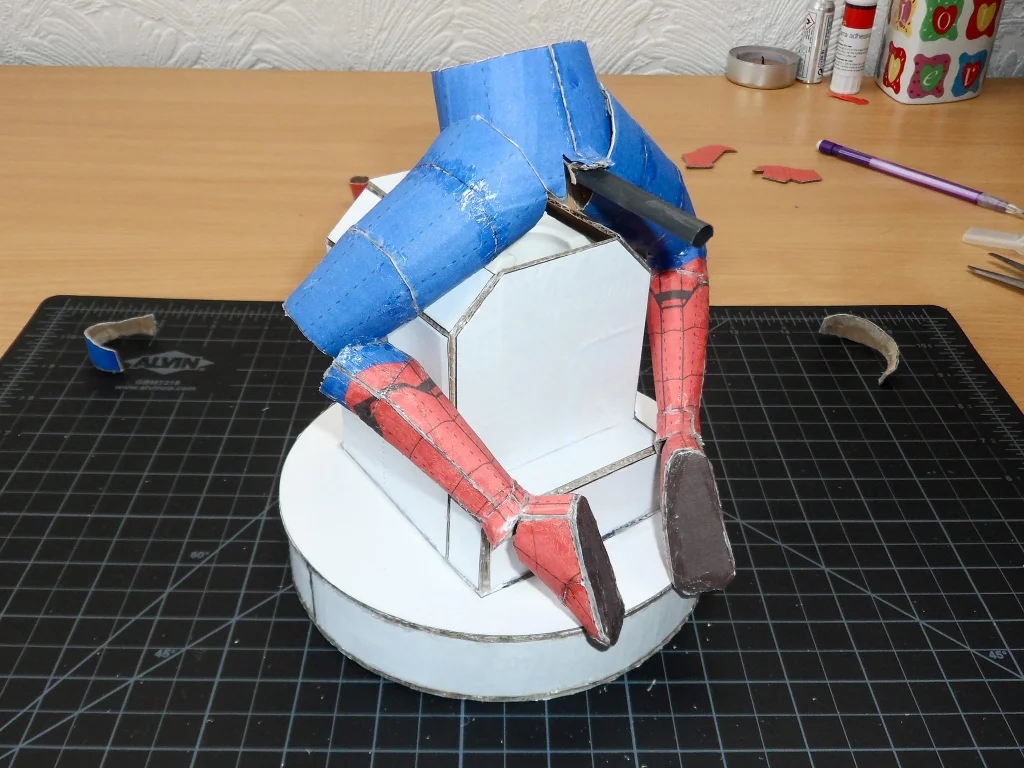
I started by placing the air freshener into the base, securing it with a piece of paper glued underneath to keep it from moving around. The air freshener is the heart of this project, so it was important to make sure it stayed firmly in place.
Next, I began attaching the paper Spider-Man parts, starting with the most crucial component: the buttock. I made sure the bottom fit snugly around the heat shrink covering the air freshener’s nozzle. From there, I worked my way up, glueing on the legs, feet, torso, arms, and head.
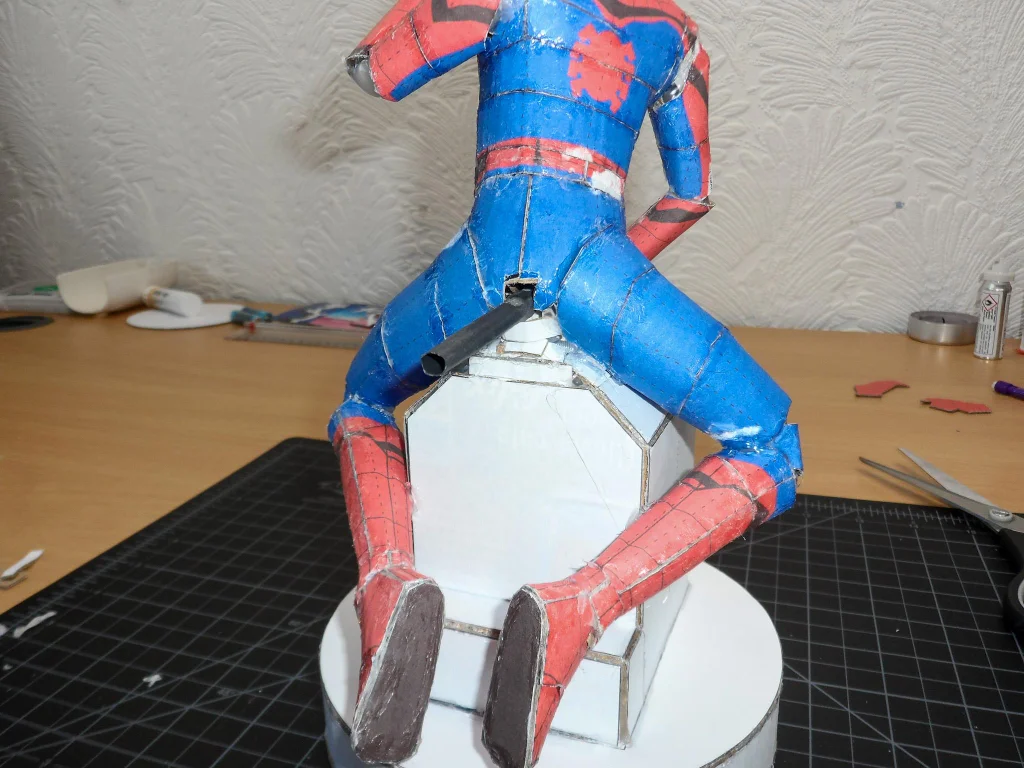
This part was definitely a trial-and-error process. I found myself removing and re-gluing pieces more times than I’d like to admit to get them just right. Once all the body parts were in place and I was satisfied with how they fit together, I covered the crotch and bottom area with spare cardboard. This was to ensure that the entire base was completely covered.
I hot-glued a piece of a wooden skewer into his left arm to act as a finger. I also reinforced the joints—his elbows and knees—with hot glue to make sure everything stayed securely in place.
Step 5: Farewell, Spidey


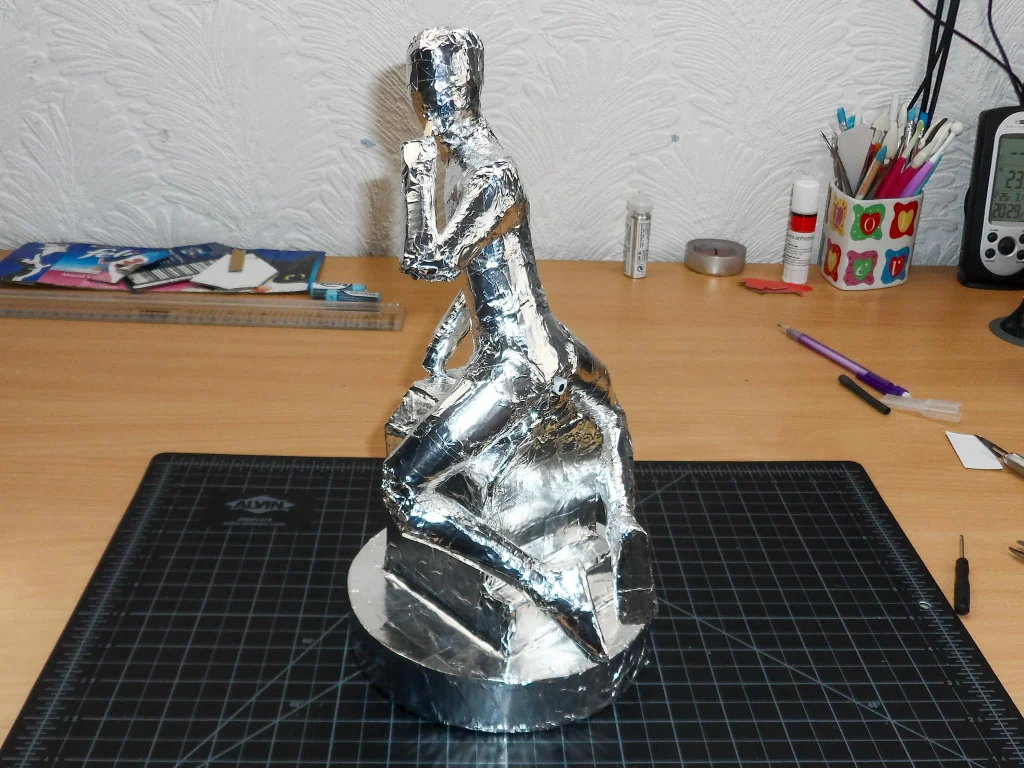
With the basic structure of Deadpool assembled, it was time to say goodbye to our stand-in hero, Spider-Man. The next step involved covering the entire figure with air-drying clay, and unfortunately, cardboard and moisture don’t exactly mix well. So, before diving into the clay work, I needed to protect the structure beneath.
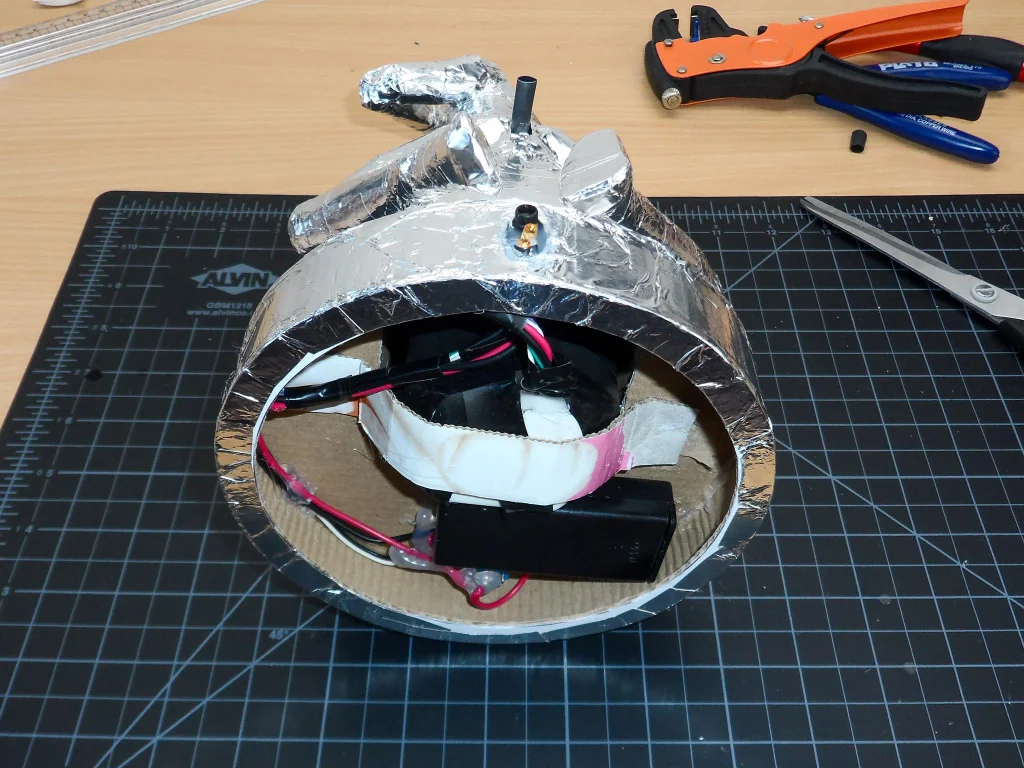
To do this, I wrapped the entire figure in aluminium tape, encasing the cardboard Spidey in a shiny new layer. The foil provided a barrier against moisture and gave the structure a bit of added stability. Plus, the adhesion of aluminium tape is fantastic—it sticks to the form without the need for drying time, making it a quick and efficient solution.
I could have used other materials to achieve the same effect, like PVC glue or Mod Podge, but I opted for the tape because it’s quick, easy, and mess-free. There’s no waiting around for anything to dry, and the tape contours nicely to all the nooks and crannies of Deadpool’s shape, making it the perfect prep layer before applying the clay.
Now, with Deadpool fully wrapped in his aluminium armour, I was ready to start sculpting the details.
Step 6: Circuit Tweaks


When I first embarked on this project, the goal was simple: create a Deadpool “statue” with an integrated air freshener. The plan was just to make sure the batteries were easily accessible and the sensor and LED were in visible positions. But, as is often the case with these projects, things quickly got more complex. What started as a straightforward build turned into something a bit more… enhanced.
If you’re looking to replicate this project with an Arduino for extra features, feel free to skip this section. But if you’re content with a quieter Deadpool who’s just here to freshen up the place, here’s what I did:
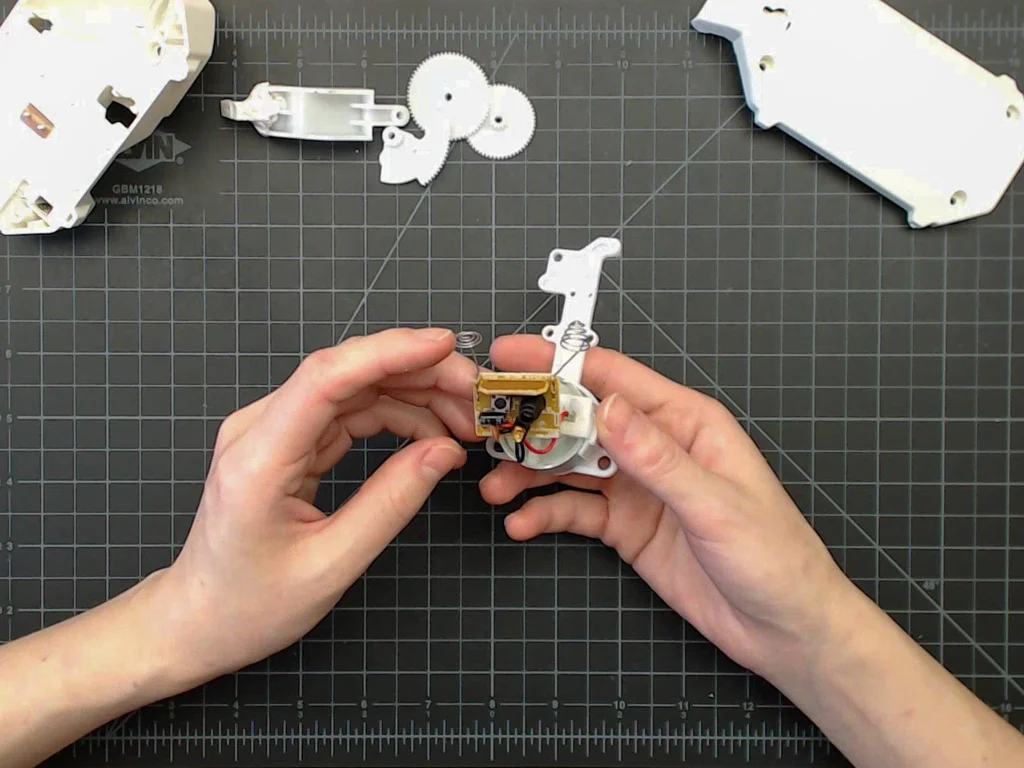
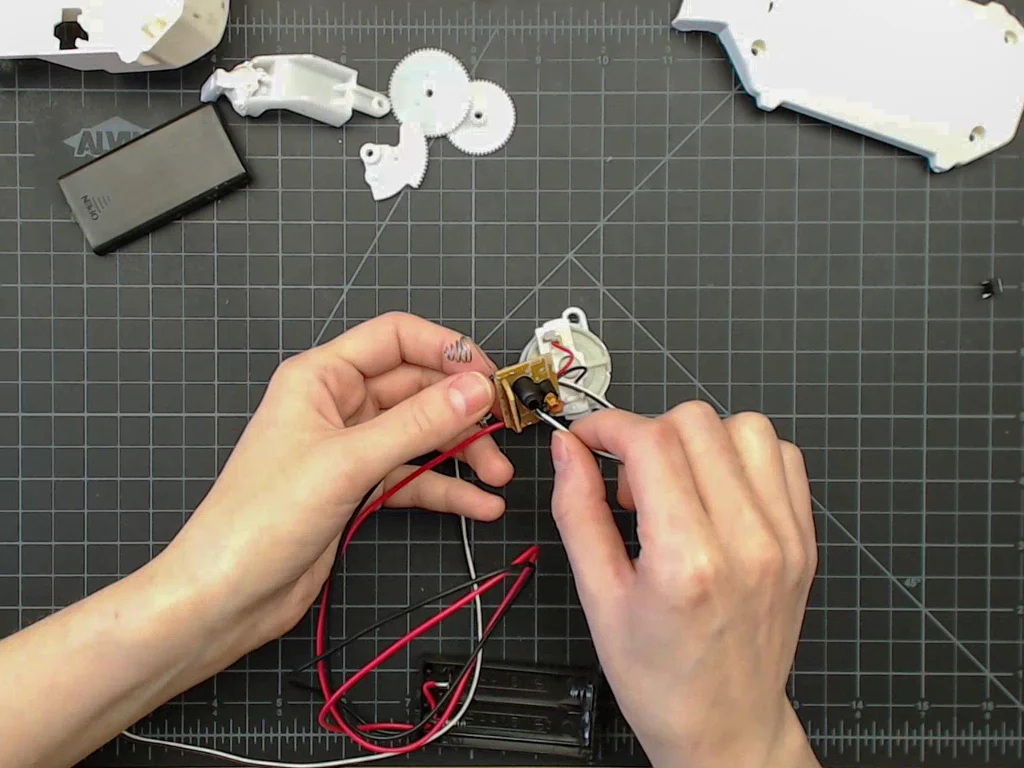
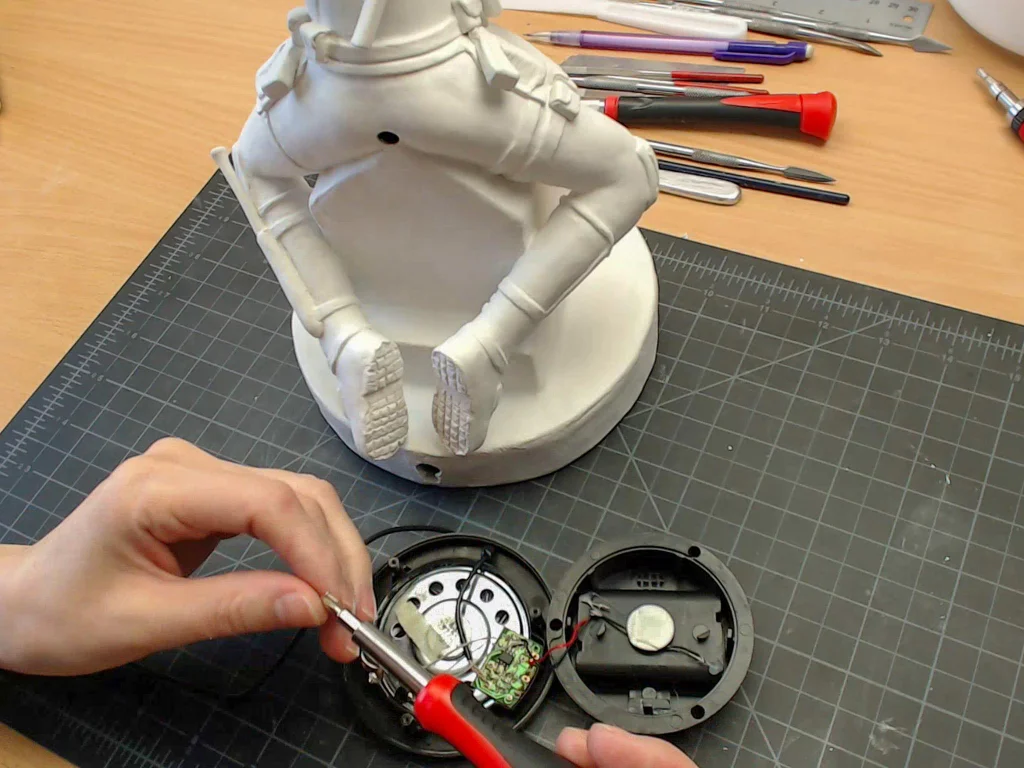
First, I disassembled the air freshener to get to the guts of the device. I soldered a battery holder onto the positive and negative contacts on the circuit board, where the batteries originally lived. This would allow me to reposition the batteries more conveniently.
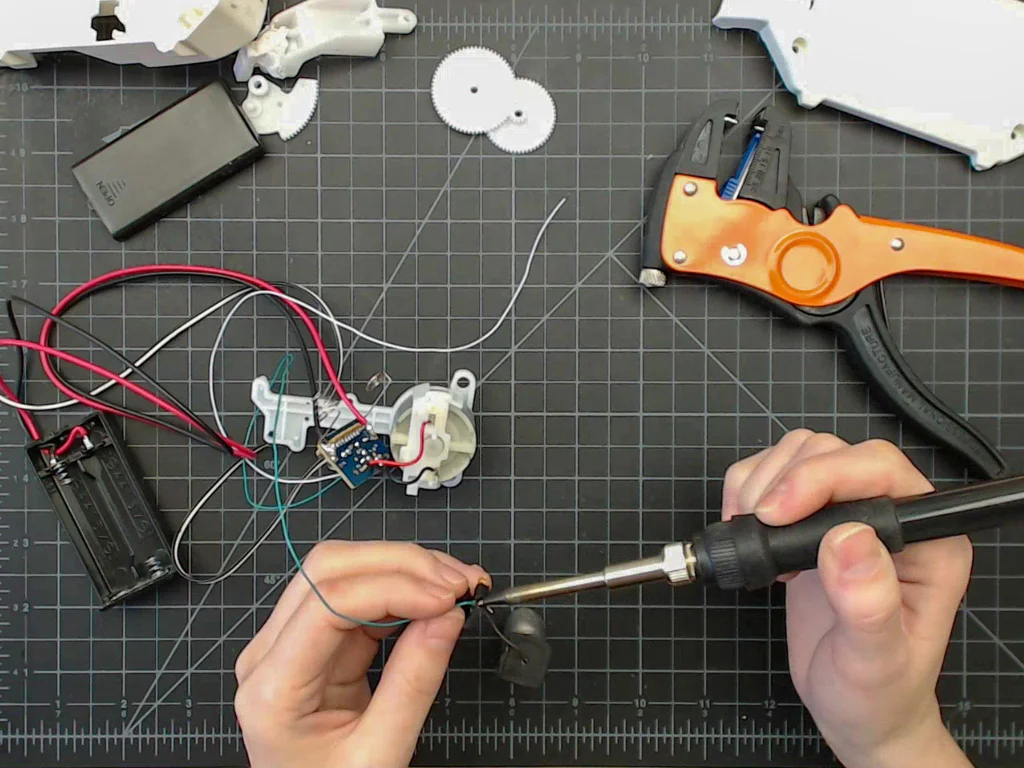
Next, I desoldered the push button, sensor, and LED from the board. I replaced them with longer wires to give these components more flexibility in where they could be placed. This way, I could position them exactly where I wanted in Deadpool’s body without being constrained by the original design.
With the push button, sensor, and LED now on longer leads, I reassembled the motor and gears inside the air freshener. Then, I threaded the wires for the batteries, push button, LED, and sensor through the front of the air freshener, where I had previously cut an opening.
Once everything was in place, I covered the opening with electrical tape to keep it secure. Then, I hot-glued all the components inside Deadpool’s base, making sure they were firmly in place.
To give myself a bit more control, I added a toggle switch to the positive wire of the batteries. This way, I could easily turn the whole system on or off without having to fiddle with the batteries every time.
Step 7: Clay Time


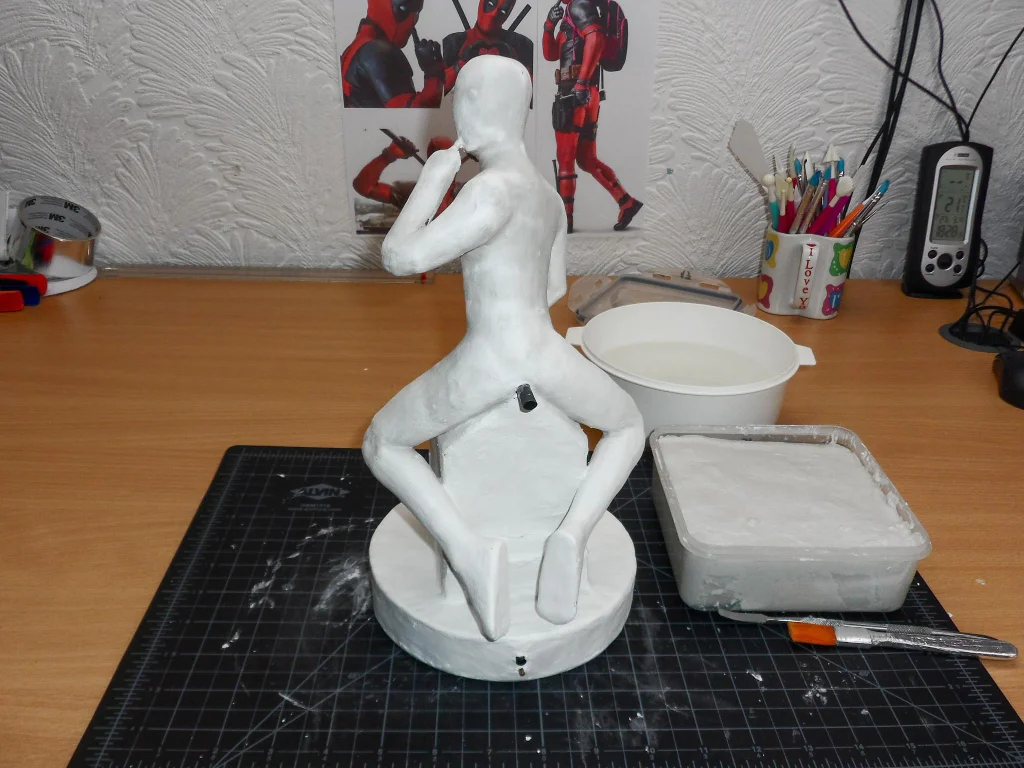
Now that the structure was set and the electronics were in place, it was time to give Deadpool some flesh—or at least a decent layer of clay. To get started, I took some air-drying clay and placed it in an airtight container, adding a bit of water to the mix. This makes the clay more malleable and easier to work with, which is especially handy when you’re covering an entire figure.
Armed with a clay modelling spatula, I began the process of gradually covering the entire statue with a thin layer of clay. The key here was to spread the clay evenly, ensuring it adhered well to the aluminium tape-wrapped structure underneath. If the clay started to dry out and became difficult to spread, I simply dipped a wide brush in water and applied it to the clay.
Once I had covered the entire figure, I let the clay dry completely. This drying step is crucial because it hardens the initial layer, making it easier to add finer details and accessories later on.
Step 8: Details


With the base layer of clay dry and ready, it was time to add some details.
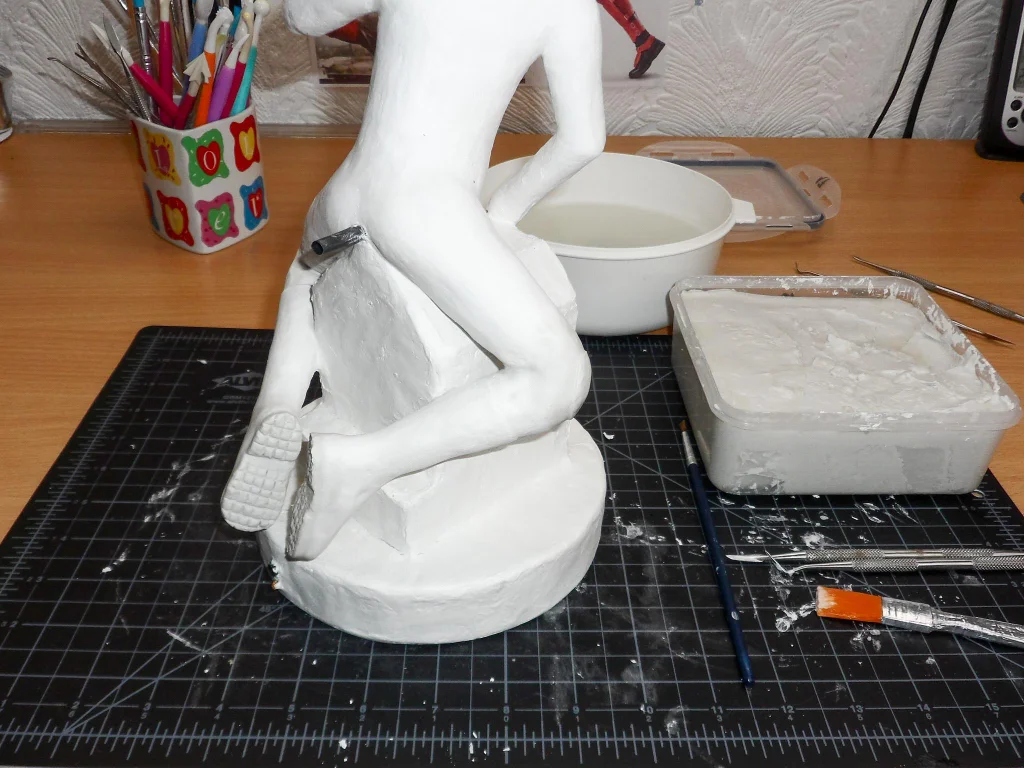
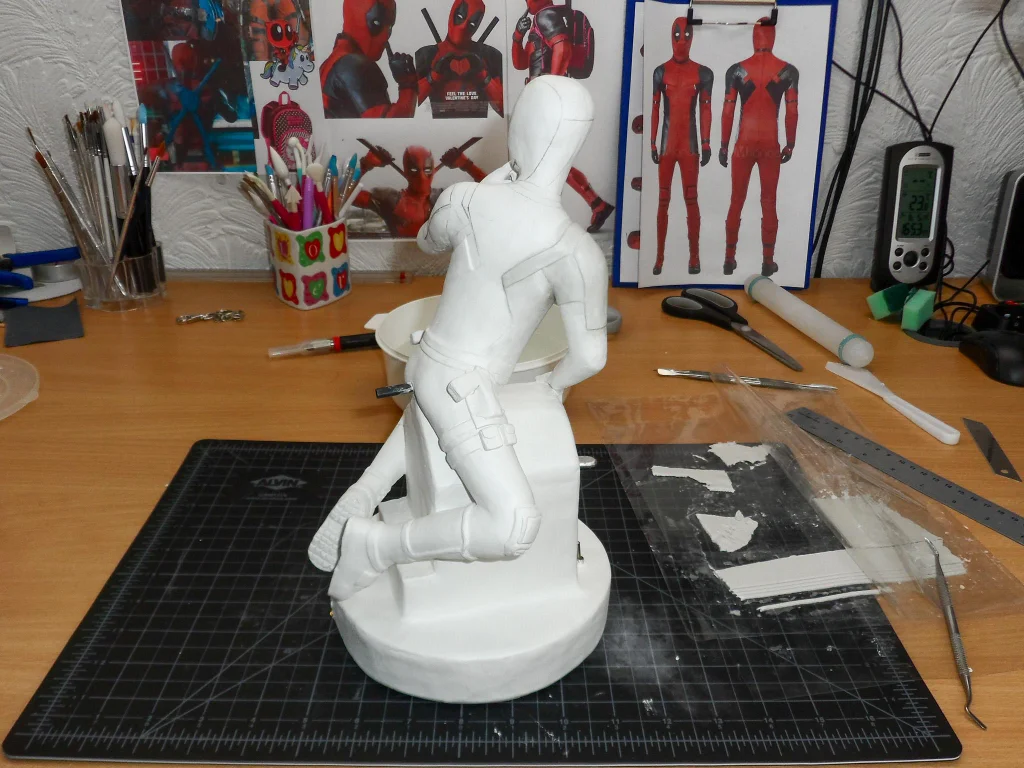
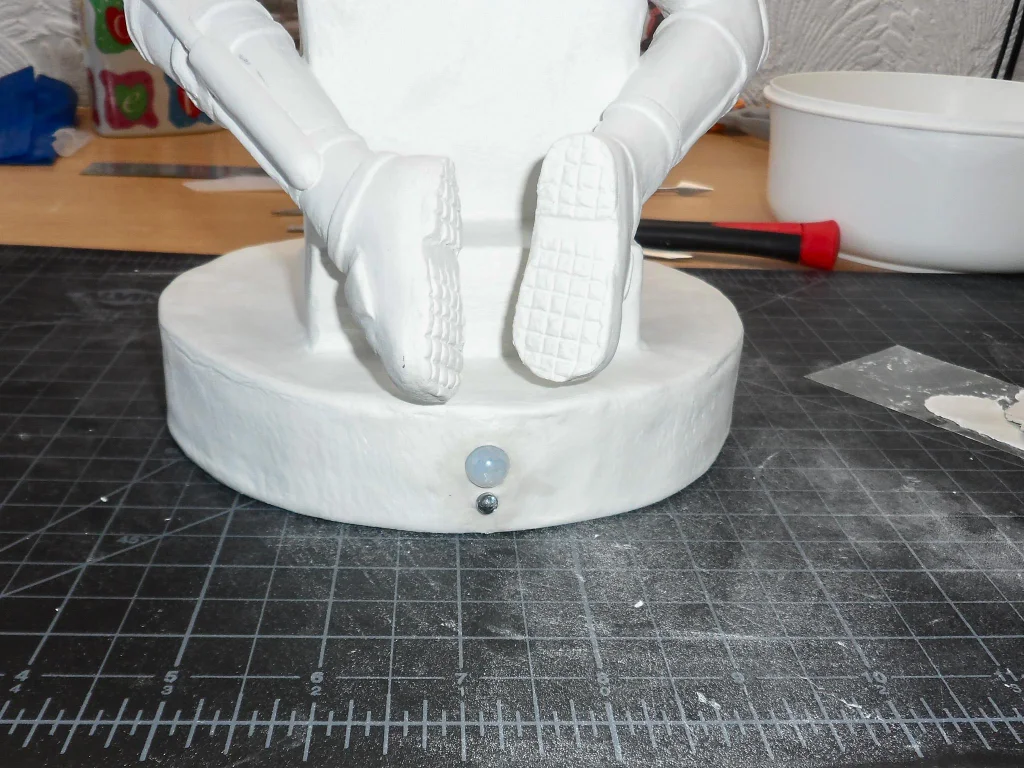
I started with his shoes. I added more clay onto the soles, using a wide clay spatula to create a pattern that mimicked the rugged texture of boots. After getting the pattern just right, I dipped a brush in water and gently smoothed the newly added clay. This helped refine the details while maintaining the texture.
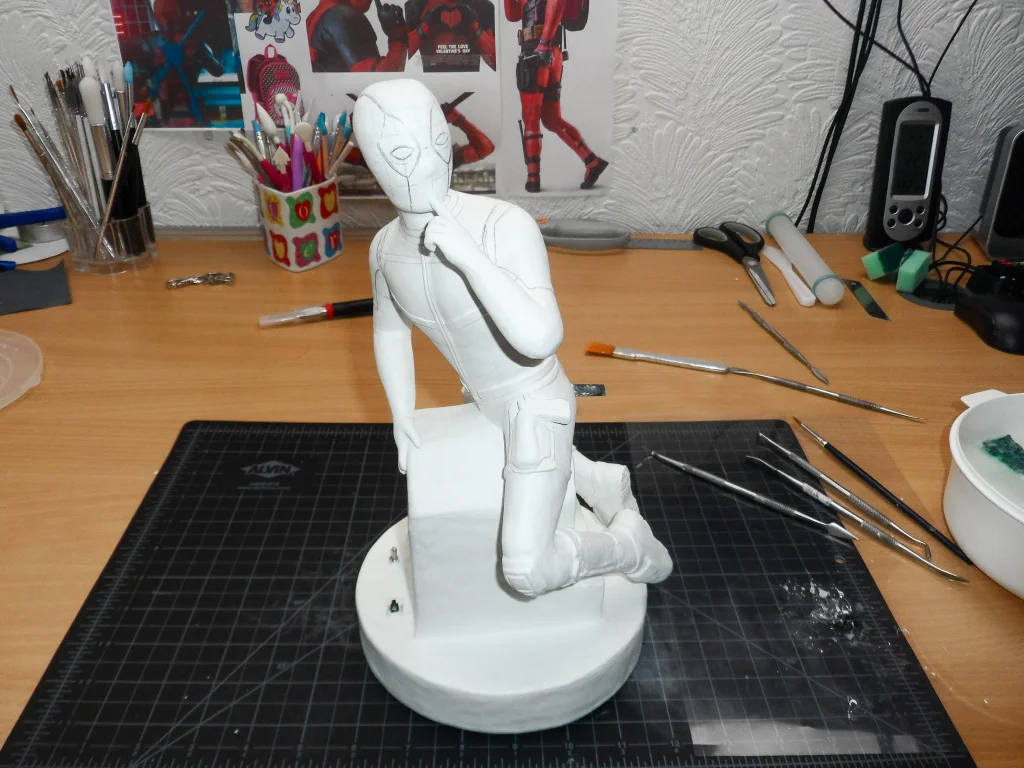
Next, I tackled the knife that Deadpool famously carries on his left leg. To do this, I cut a piece of a wooden skewer and attached it to the leg using a couple of pieces of aluminium tape. This provided a sturdy base for the knife. I then covered most of the skewer with clay, shaping it to look like the knife’s handle and sheath. To help guide my work, I drew a few lines in the clay to better visualise where everything should go.
With the shoes and knife in place, it was time to focus on Deadpool’s accessories. I continued adding clay, sculpting his belt, gun holders, guns, and knee pads.
As I worked, I continually smoothed the clay with a brush dipped in water, refining the details and ensuring each accessory blended seamlessly with the rest of the figure. This process was a bit time-consuming, but seeing Deadpool’s personality come through with each added detail made it worth the effort.
Step 9: Hands


As I continued working on Deadpool, I hit a snag: his hands just didn’t look right. Hands are tricky, and getting them to look natural can be a challenge. So, I decided to take a step back and rework them from the ground up.
Using a hobby knife, I removed all the excess bits from the hands. Once the excess clay was cleared away, I reattached the skewer that formed the base of the hands. To give the hands more structure, I filled the area with hot glue and covered it with aluminium tape, ensuring a solid, moisture-proof foundation.
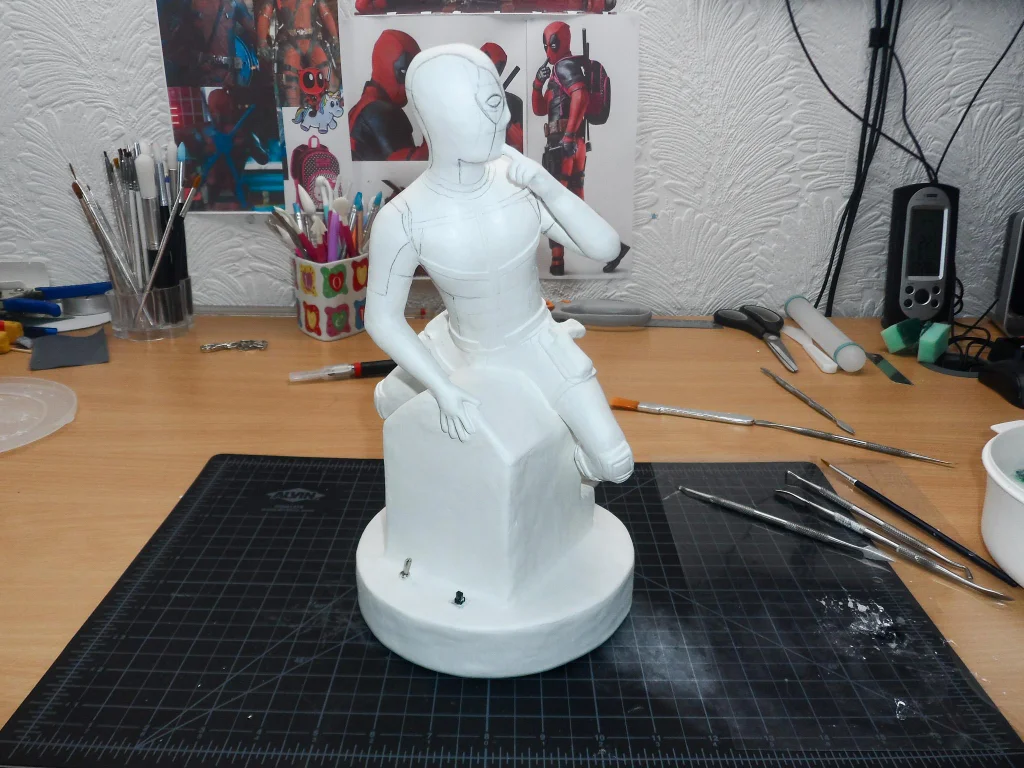
To guide the sculpting process, I drew a few more visual lines on the clay. Satisfied with the initial repairs, I moved on to refining the entire base. I rolled out a fresh piece of clay using a rolling pin, creating a smooth, even layer. Bit by bit, I applied this rolled clay over the entire base, covering the base again. This not only made the figure smoother but also gave it a slightly thicker, more robust appearance.
With the base now refined and the hands prepped, it was time to sculpt the finer details. I modelled Deadpool’s little hands and fingers, paying close attention to the natural curves and bends. I used a combination of small sculpting tools and my fingers to shape the clay, constantly smoothing and adjusting until the hands looked relatively natural and proportioned.
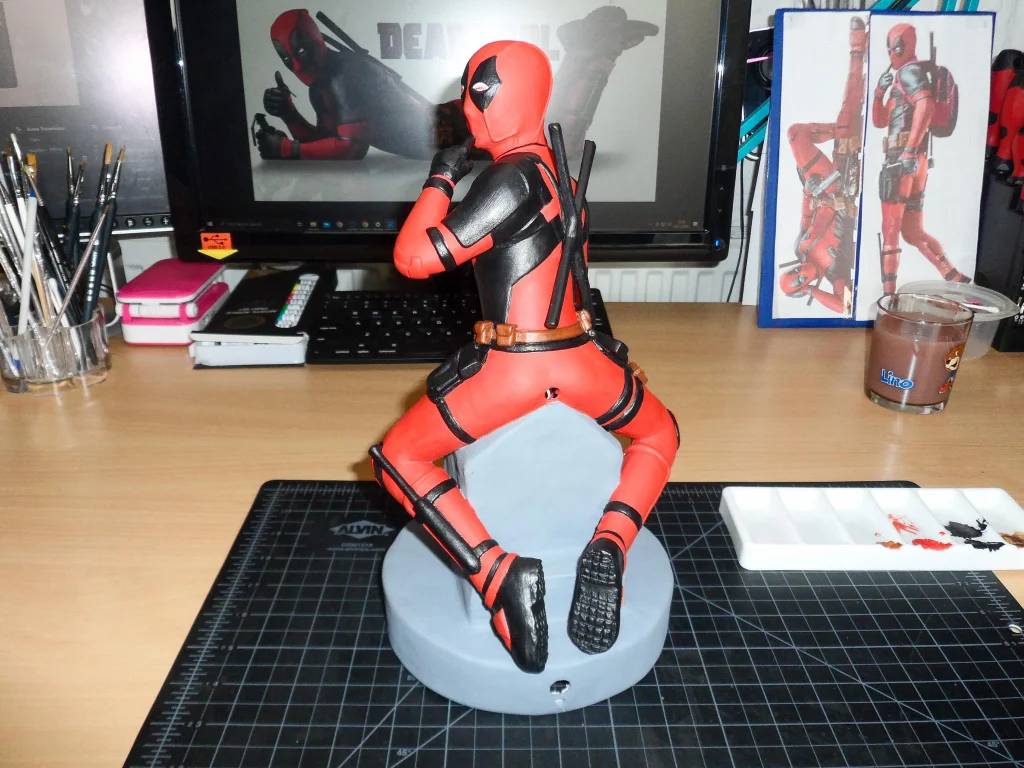
Step 10: Costume and Katanas


To add more depth and detail to Deadpool’s costume, I rolled out more clay using a rolling pin and cut it into thin strips with a metal ruler. These strips would become the various straps, seams, and textures that define Deadpool’s look. After wetting the surface of the figure with a brush to help the clay adhere, I placed the strips onto the wetted areas.
Using clay modelling tools, I nudged and adjusted each strip into position, making sure everything lined up just right. The tools were also handy for pressing the clay into the underlying layer, ensuring a strong bond. If I felt that I had used too much clay in any area, I either removed it with a hobby knife or re-wet the clay and scraped away the excess with the modelling tools. This gave me precise control over the level of detail and the overall texture of Deadpool’s suit.
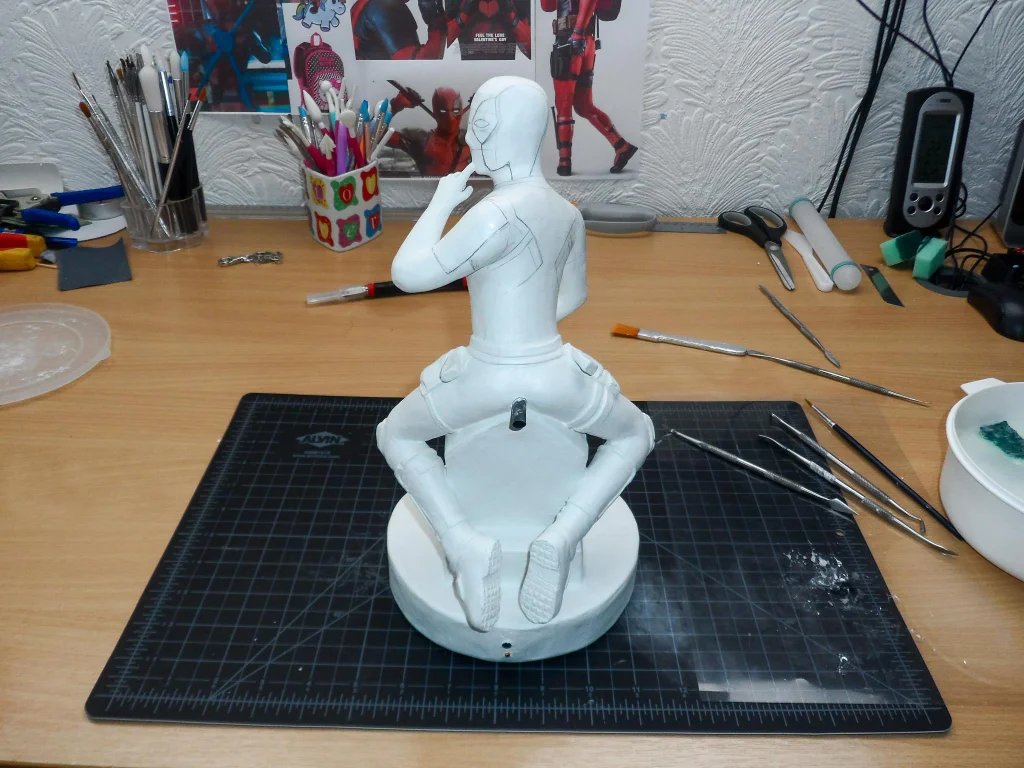
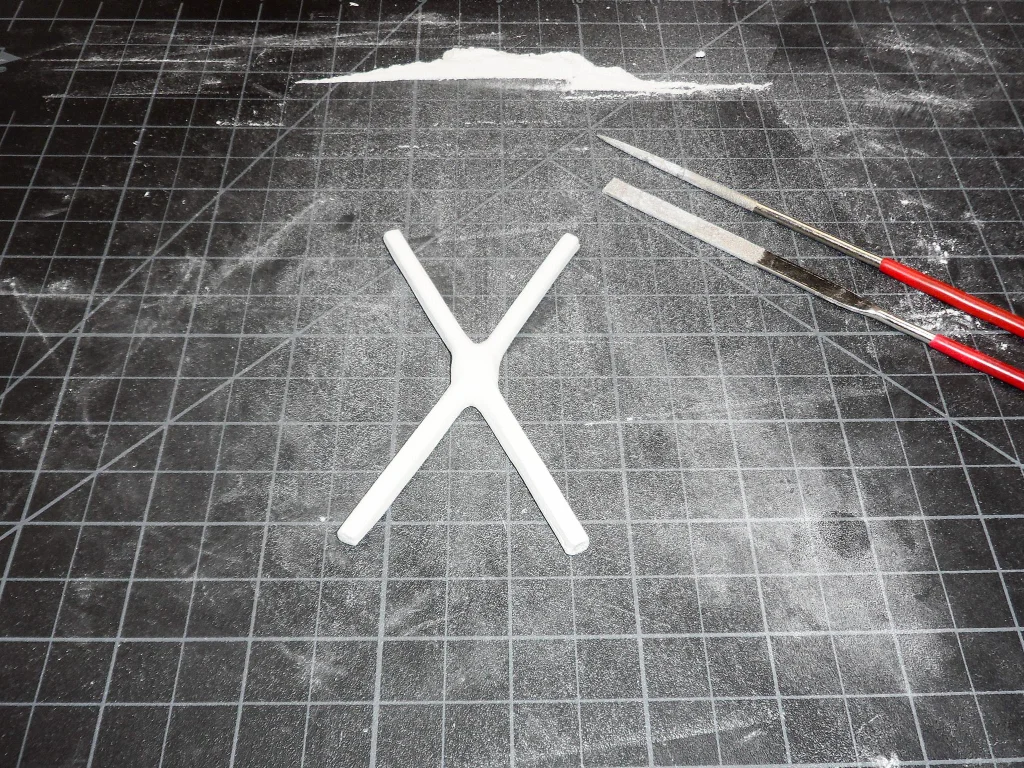
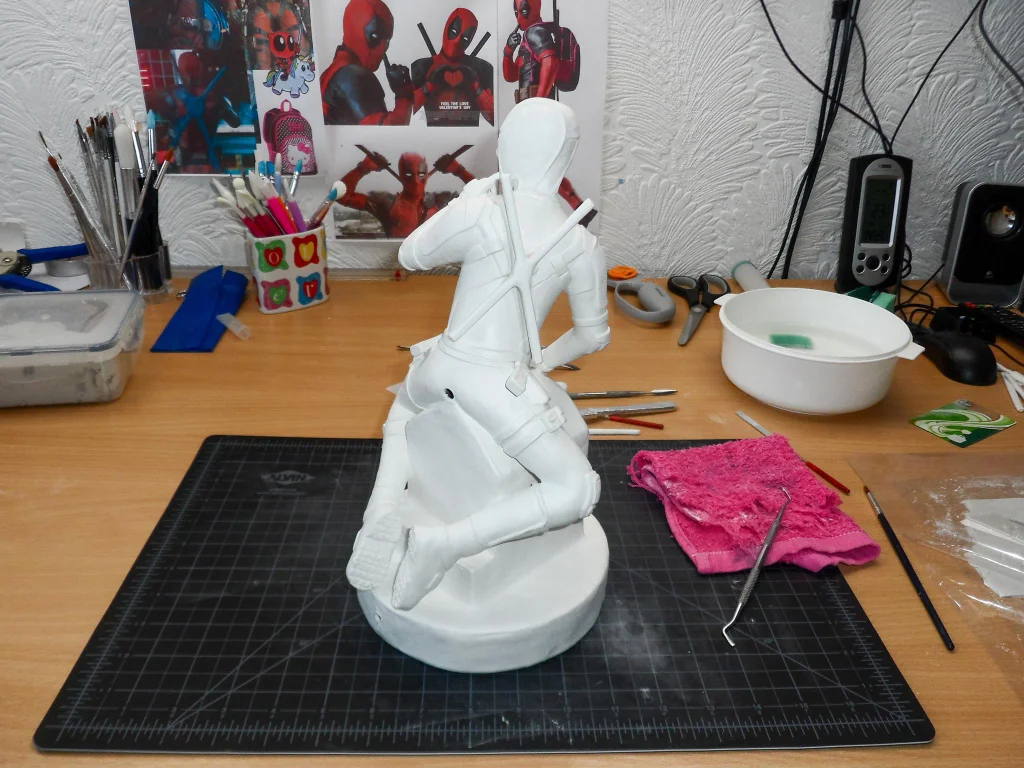
To create katanas, I took two pieces of skewer, crossed them and covered them in a layer of clay. Once the katanas were ready, I moved on to attaching them to Deadpool’s back. I started by lightly wetting the area on his back where the katanas would be placed. Then, I added a fresh layer of clay to this area, creating a soft surface for the katanas to adhere to. I pressed them into the wet clay, adjusting as needed to ensure they were securely attached.
Step 11: Speaker, PIR Sensor and LED


At this stage of the project, I had a sudden flash of inspiration—why not make Deadpool audibly fart? To make this vision a reality, I had to redo some of the electronics.
First, I needed to remove some components that were no longer necessary. The previously attached battery holder, LED, and sensor had to go, as they wouldn’t be needed for this new feature. However, I left the push button and toggle switch intact—they would still play a crucial role in controlling the system.
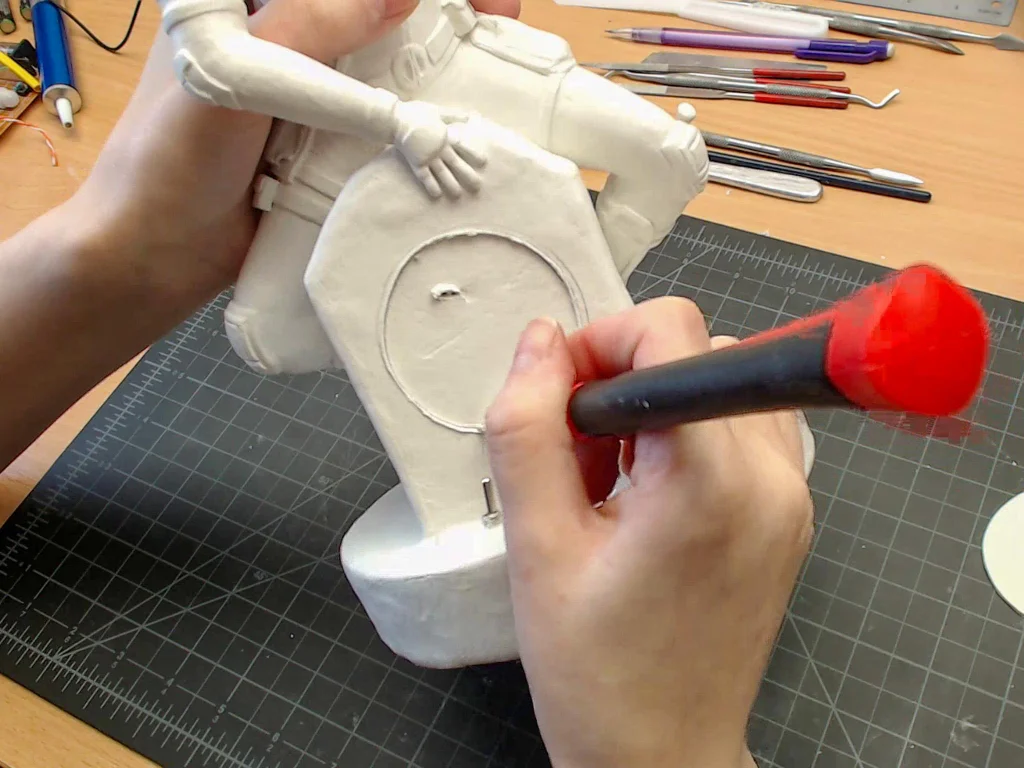
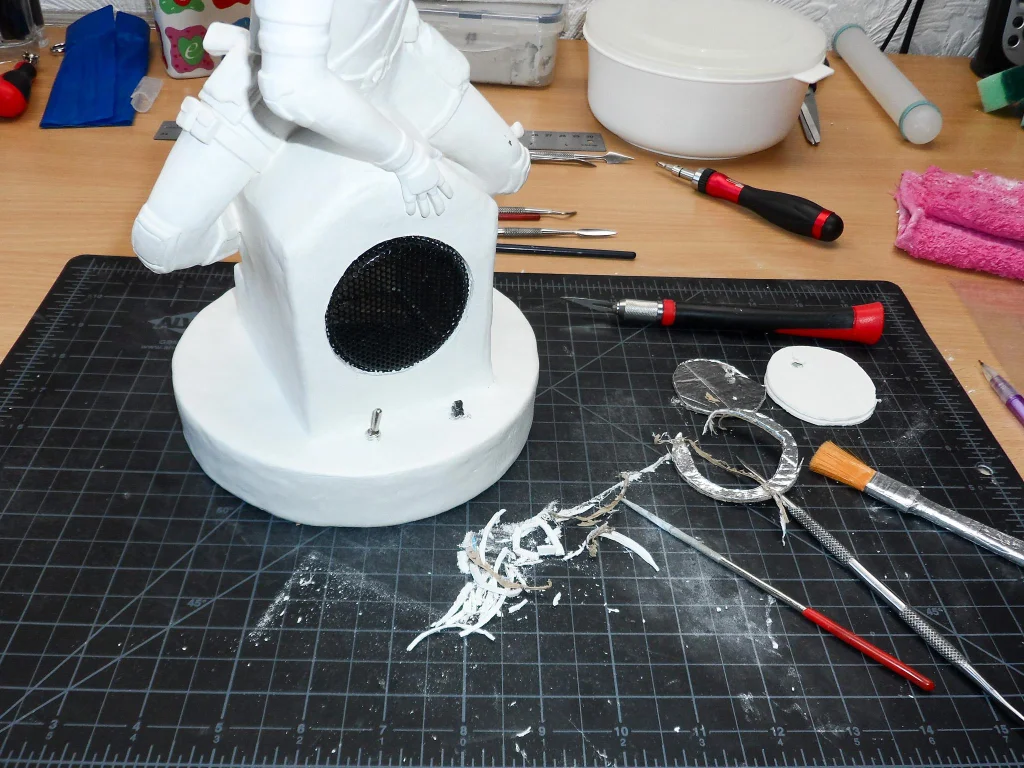
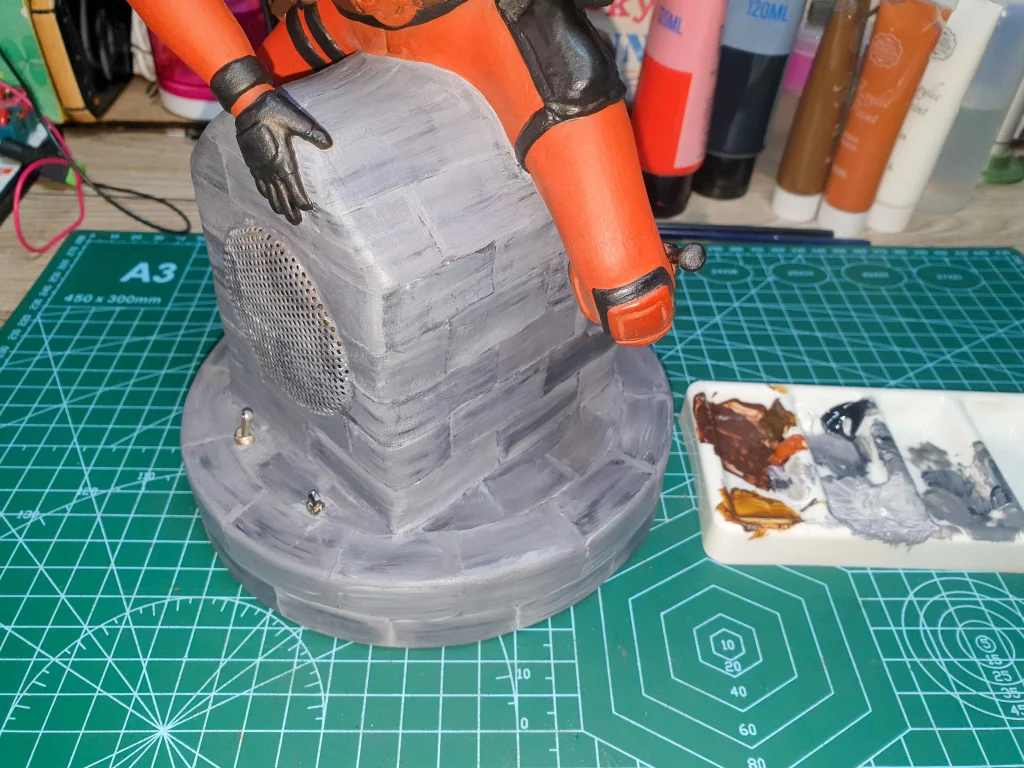
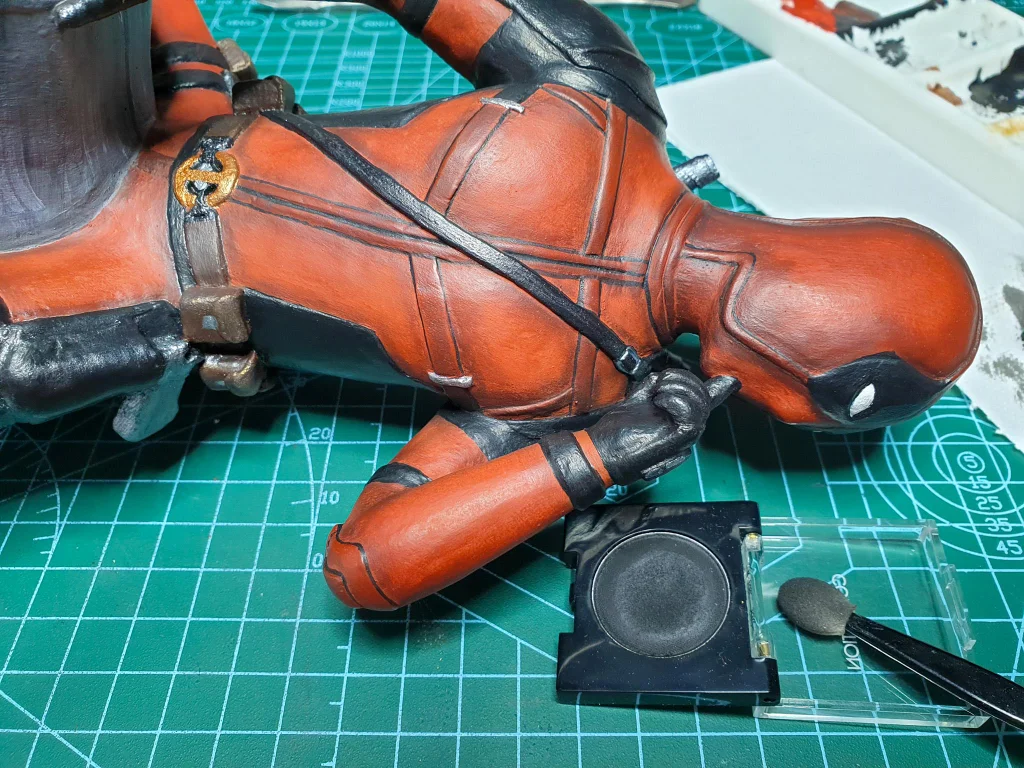
I decided to use a Pringles speaker I had on hand—just waiting for a project like this. After taking the speaker apart, I removed the speaker itself and the metal cover. To integrate the speaker cover into the base, I centred it on the front of the base and traced a circle around it with a pencil. Using a hobby knife, I cut out this circle in the clay. The speaker cover had a recessed edge, so I needed to cut a slightly bigger circle in the clay and a smaller one in the cardboard beneath to accommodate it. This ensured the cover would sit flush with the surface, blending seamlessly into Deadpool’s design.
Next, I had to make room for the new PIR sensor and LED. I enlarged the existing hole using a hobby knife and a file, expanding it until the sensor and LED fit snugly into place. Once they were properly fitted, I inserted the speaker cover, the LED, and the PIR sensor into their respective positions.
To secure everything, I added a little more clay around the edges of the speaker cover, ensuring it was firmly in place. From this point on, the speaker cover wouldn’t be removable, so I made sure it was positioned well before the clay dried.
Once the clay was dry, I removed both the LED and the PIR sensor from their positions. This would make it easier to paint the base later on without getting any paint on the electronics.
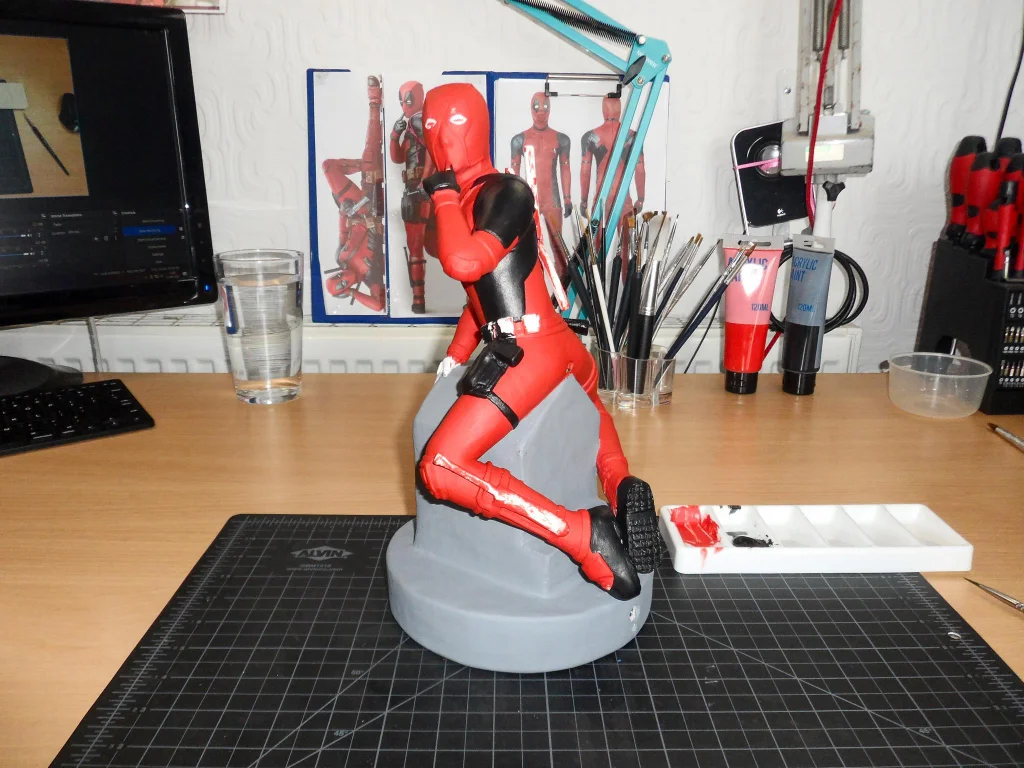
Step 12: Adding Colour


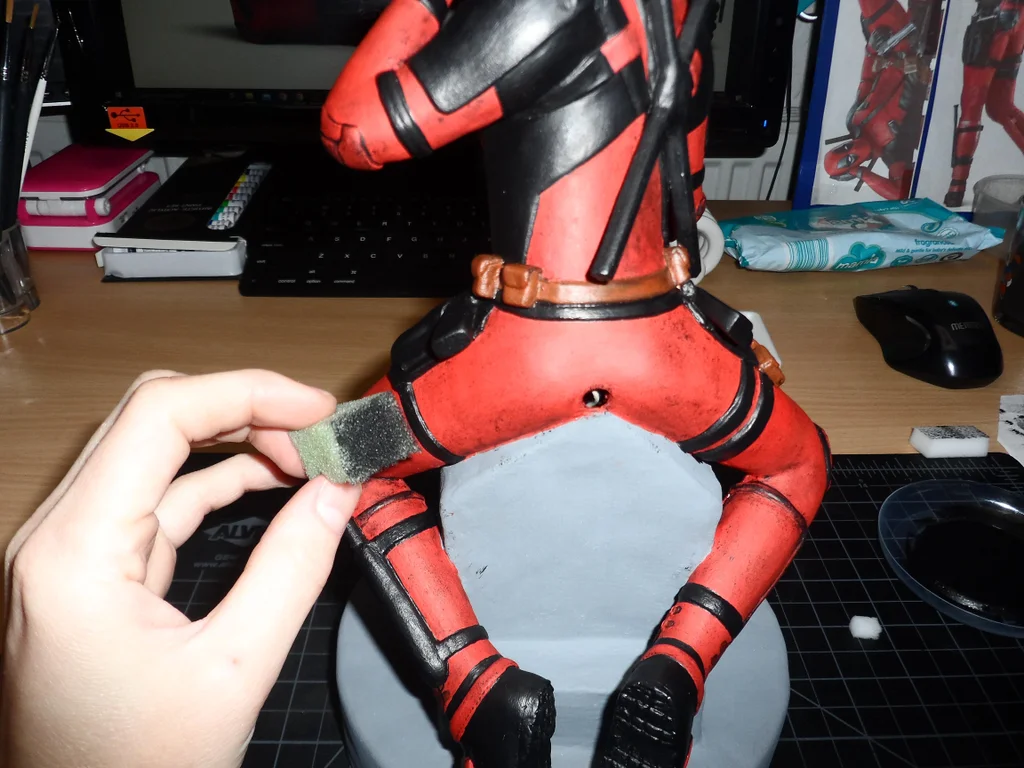
Step 13: Texturing


As I stepped back to evaluate my work, I realised that, while Deadpool’s colours were not too bad, something was missing. He looked a bit too flat and clean—two things Deadpool most definitely is not. This is a guy who’s constantly getting into scrapes, so it only made sense to give his suit some well-deserved wear and tear.
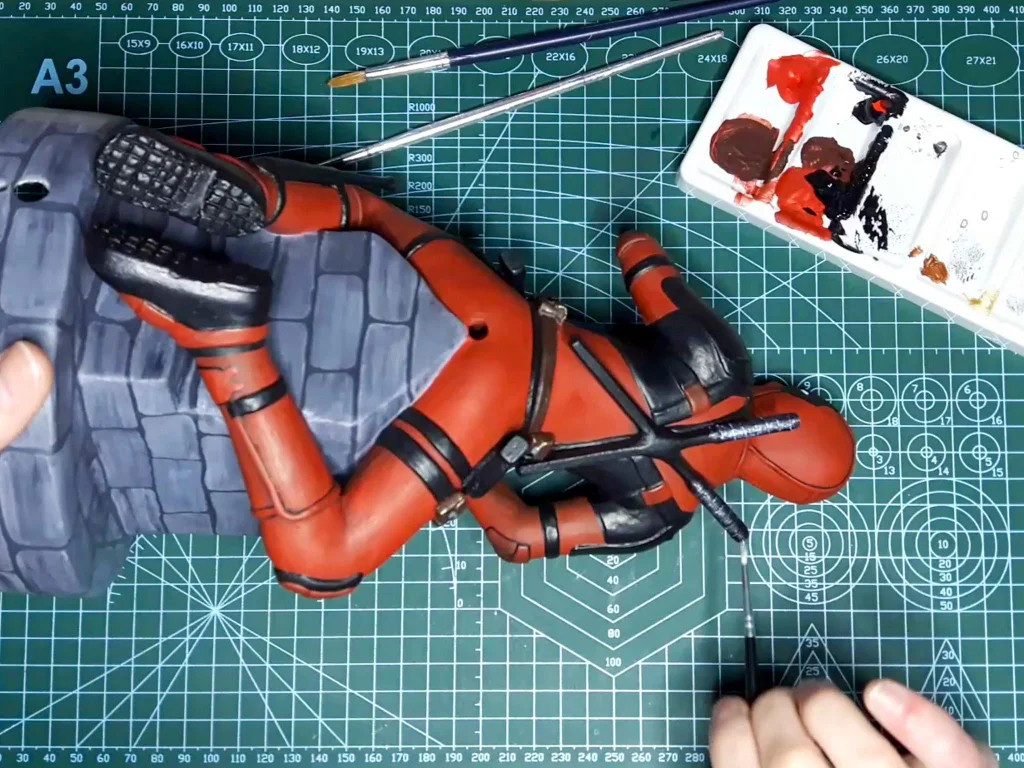
To give Deadpool’s suit a more rugged, lived-in look, I decided to “dirty” him up. Using a cut-up sponge, I dipped it into a very watery mix of black acrylic paint and lightly dabbed it all over the red parts of his suit. This technique added a layer of grime and shadow, making the suit look more textured and battle-worn.
The katanas also needed a little love. They looked too plain and didn’t quite fit. To fix this, I took a piece of thin ribbon and wrapped it around the tops of the katanas, securing it with super glue. After that, I painted over the ribbon with black acrylic paint. This added a more authentic, handcrafted look to the katanas.
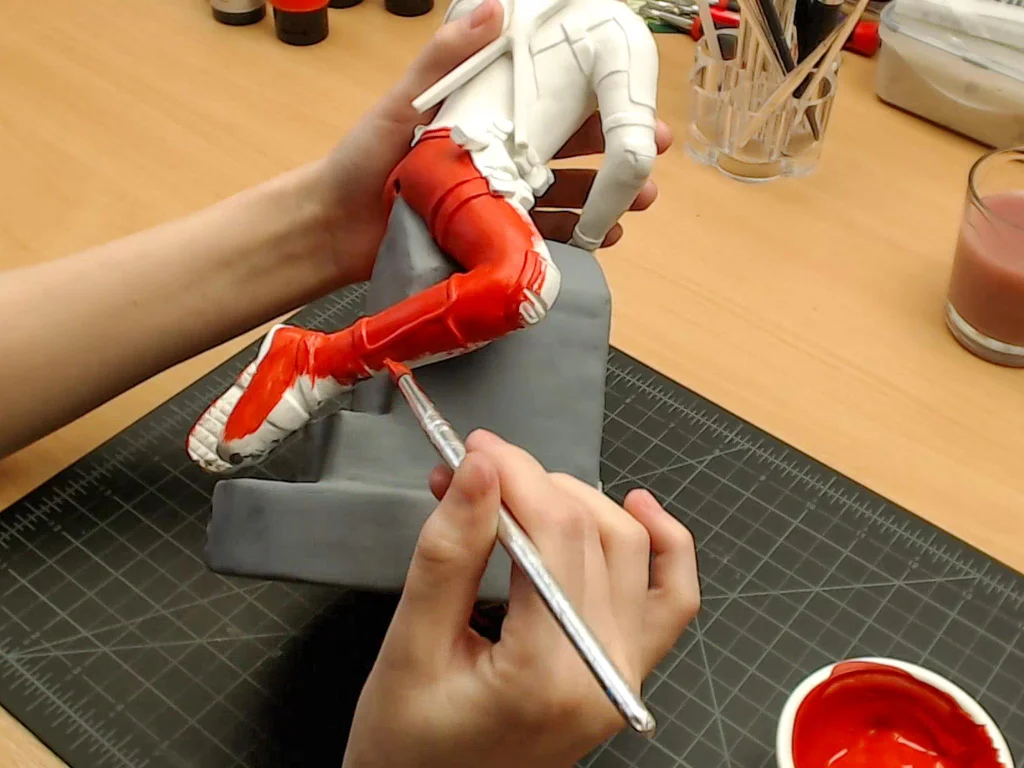
Feeling inspired to add even more texture, I remembered I had a cheap airbrush lying around. I figured, why not give it a try? Now, keep in mind, I had never used an airbrush before, and I didn’t have any proper airbrush paint. But I decided to wing it.
I cleaned off the previous “dirty” dabs with a wet wipe, mixed some red acrylic paint with isopropyl alcohol, and loaded it into the airbrush. As I sprayed the red parts of Deadpool’s suit, I noticed that it added a texture that made the suit look better. However, there was an unexpected twist—tiny, shiny bits appeared all over the suit. I hadn’t realised that acrylic paint contains these little particles, which became visible when mixed with the isopropyl alcohol.
While the shiny bits weren’t part of the plan, I decided to embrace them. After all, Deadpool is all about the unexpected. Despite the imperfections, I quite liked the added texture and decided that it was time to call it a day. Sometimes, the quirks and mistakes in a project give it that extra bit of character, and this was definitely one of those times.
So, while this airbrushing experiment wasn’t perfect, it added a unique touch to Deadpool’s suit that I wouldn’t have gotten any other way. And since this project had already taken longer than expected, I chose to leave it as is—because if I kept tweaking, I might never finish.
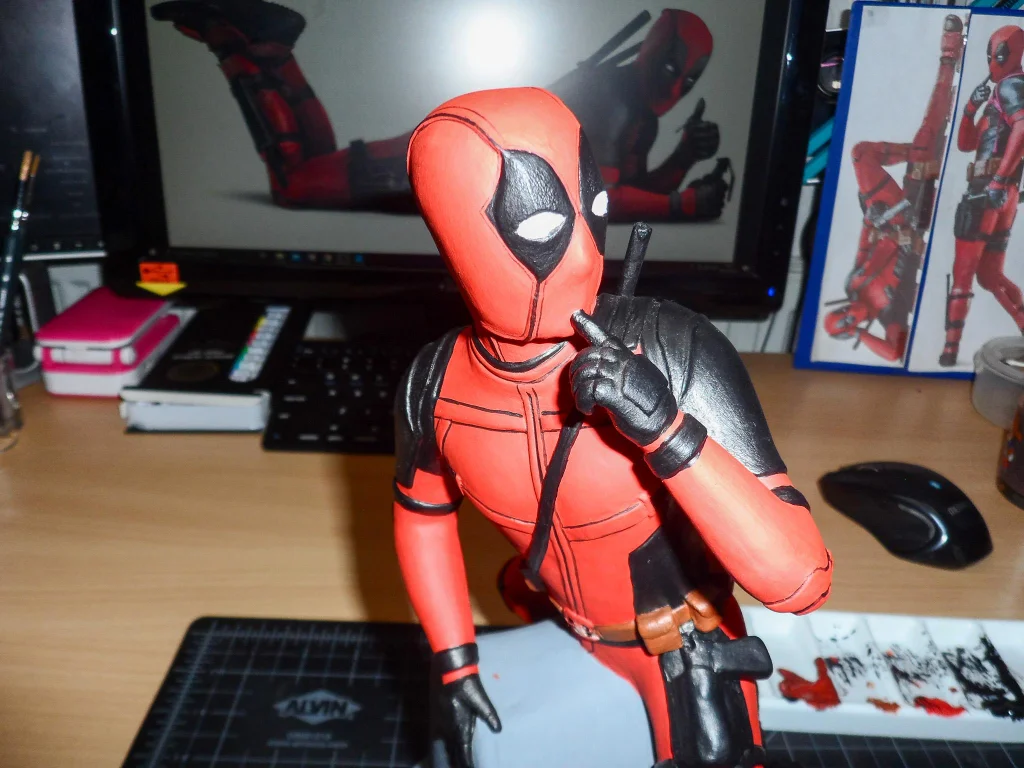
Step 14: Refining the Details


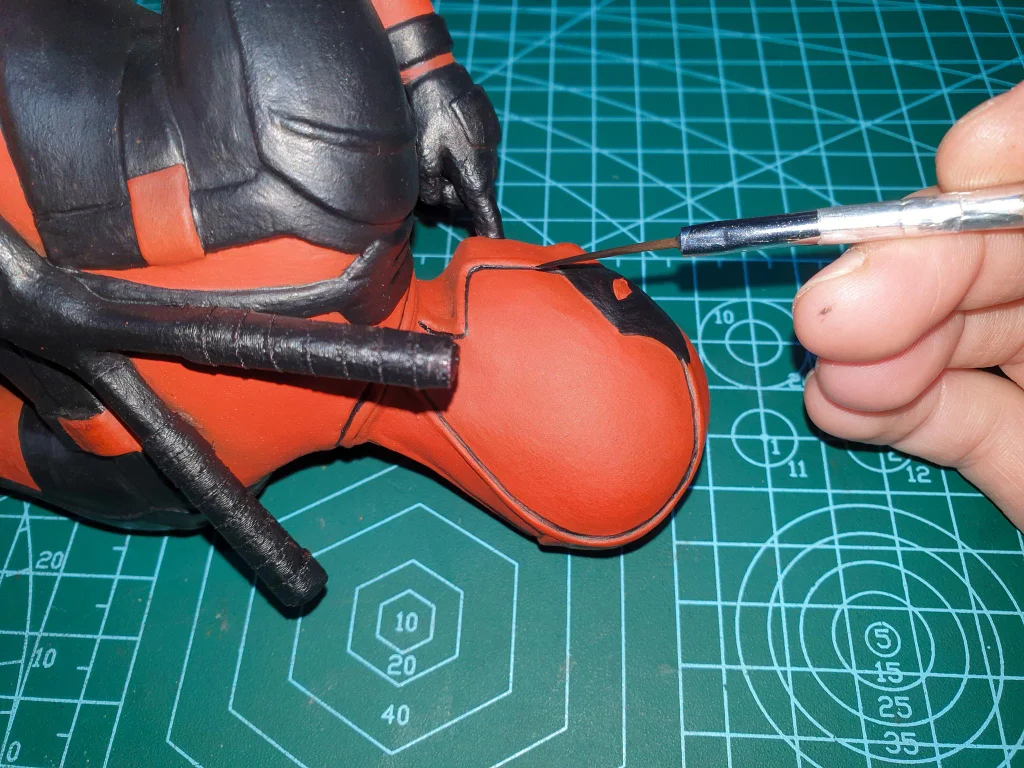
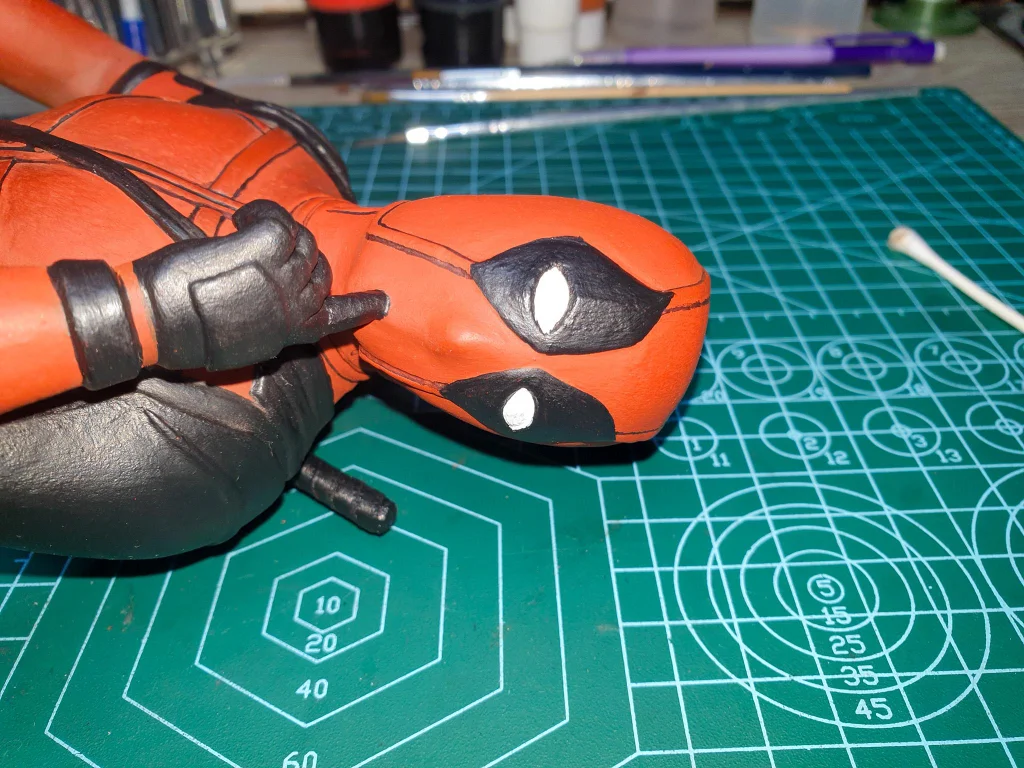
After adding texture and character to Deadpool’s red suit, I revisited the black parts. Using a fine brush, I repainted the black areas of his suit, like the gloves, shoulder patches, and details around his mask. This final layer brought out the contrast between the red and black, making the suit look sharp and defined. Once I was relatively happy with how it all came together, I decided it was time to move on to the base.
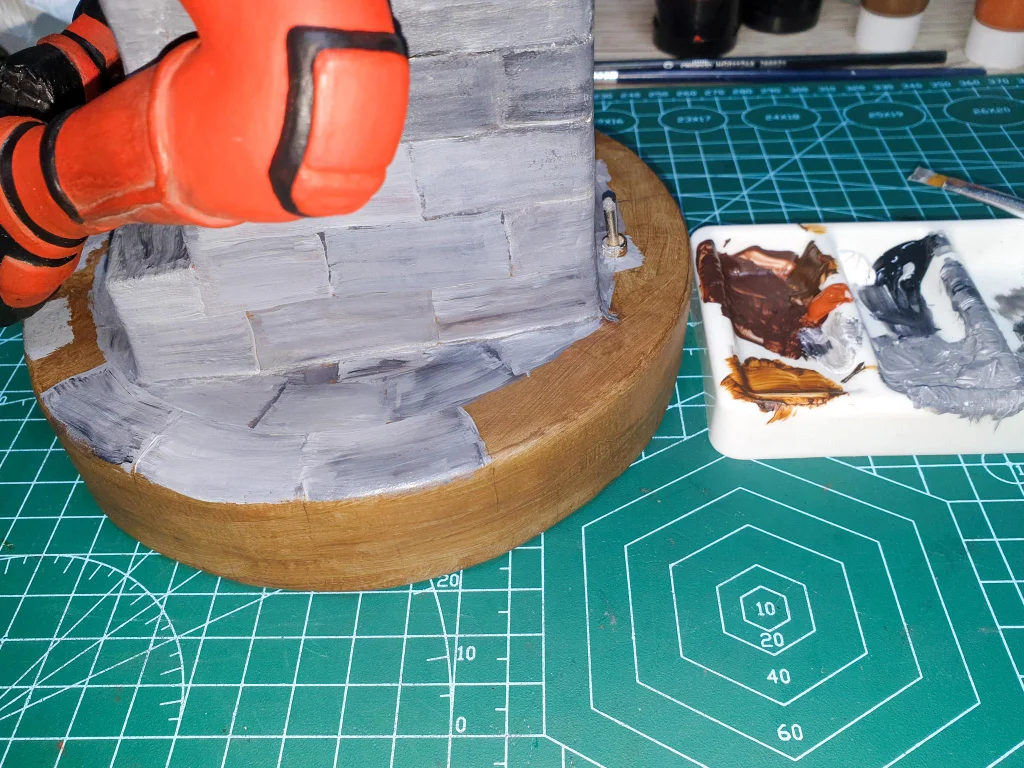
For the base, I wanted something that would complement Deadpool’s look, so I decided to go with a stone pattern. I started by drawing the outlines of individual stones directly onto the base, using a pencil to map out the pattern.
I began by painting the entire base with a thin layer of brown acrylic paint. Once the brown paint dried, I dipped my brush into both white and black paint, blending them together to create a splodgy grey colour. I painted this over the brown, creating a distressed look, mimicking the uneven texture of real stone.
With the stone pattern taking shape, I mixed a darker shade of grey to paint the mortar lines between the stones. Applying this dark grey paint between the stones made them stand out, adding a bit of depth to the base.
Step 15: Contrast and Belt


Step 16: A Little Shadow and Shine


Step 17: The Code Behind the Chaos

Just like Deadpool’s body, the Arduino code for this project went through quite a few iterations. Initially, my plan was simple: have a fart noise play just before the air freshener kicked in. But then I thought, ‘What a waste of the DFPlayer and SD card!’ So, I decided to add a few of Deadpool’s one-liners from the movies—and who knows, I might add even more down the line.
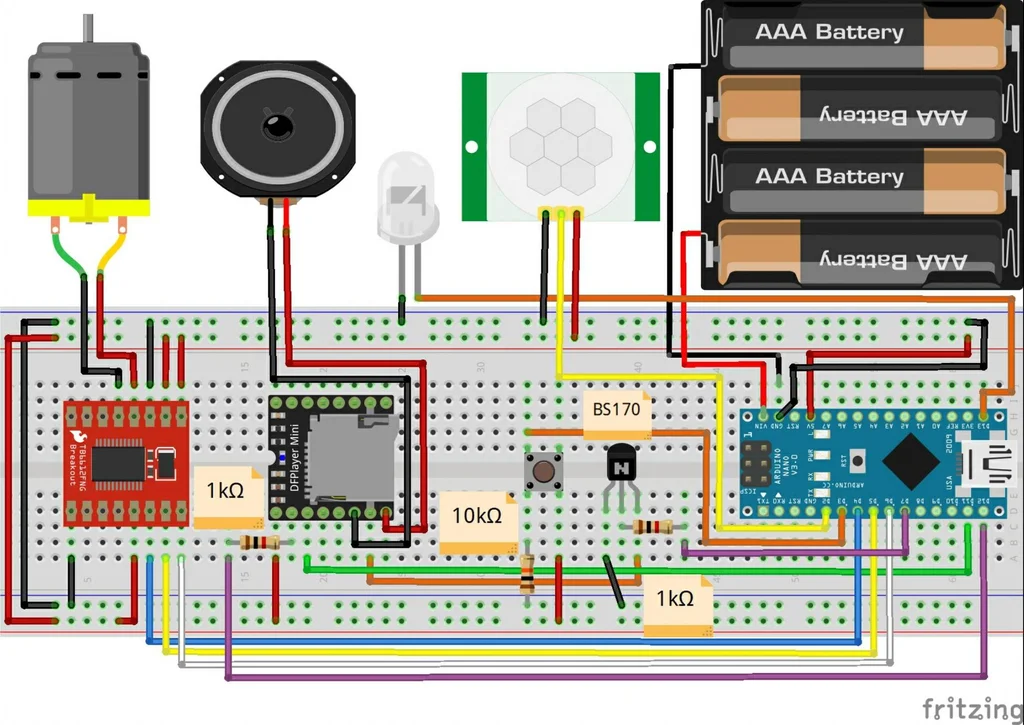
At first, I thought 4 AA batteries would be enough to power both the DFPlayer and the motor, but I quickly realised that wasn’t going to cut it. The DFPlayer draws quite a bit of current, and the AA batteries just couldn’t keep up. So, I switched to using two 18650 batteries. These are high-drain batteries, which made them perfect for this setup. Everything was running smoothly, but I noticed the batteries only lasted about three days.
To address the battery drain issue, I introduced a BS170 N-channel MOSFET into the circuit. With a bit of additional Arduino coding, I managed to extend the battery life to around 10 days—a significant improvement. The MOSFET allows me to control the power to the DFPlayer more efficiently, reducing the current draw when it’s not needed.
I uploaded the final code to an Arduino Nano clone and prepared the SD card for the DFPlayer. For the DFPlayer to play the audio files correctly, they need to be placed directly on the SD card (not in a folder) and must be numbered sequentially, such as 0001.mp3, 0002.mp3, and so on.
Here’s how the audio files are organised:
- 0001.mp3: The fart sound.
- 0002.mp3: The tune Deadpool plays when the power is turned on.
- 0003.mp3 and beyond: Various one-liners from Deadpool’s movies.
Below, you’ll find the Arduino code I used, along with the audio files I included on the SD card. Feel free to customise the code and audio to your liking.
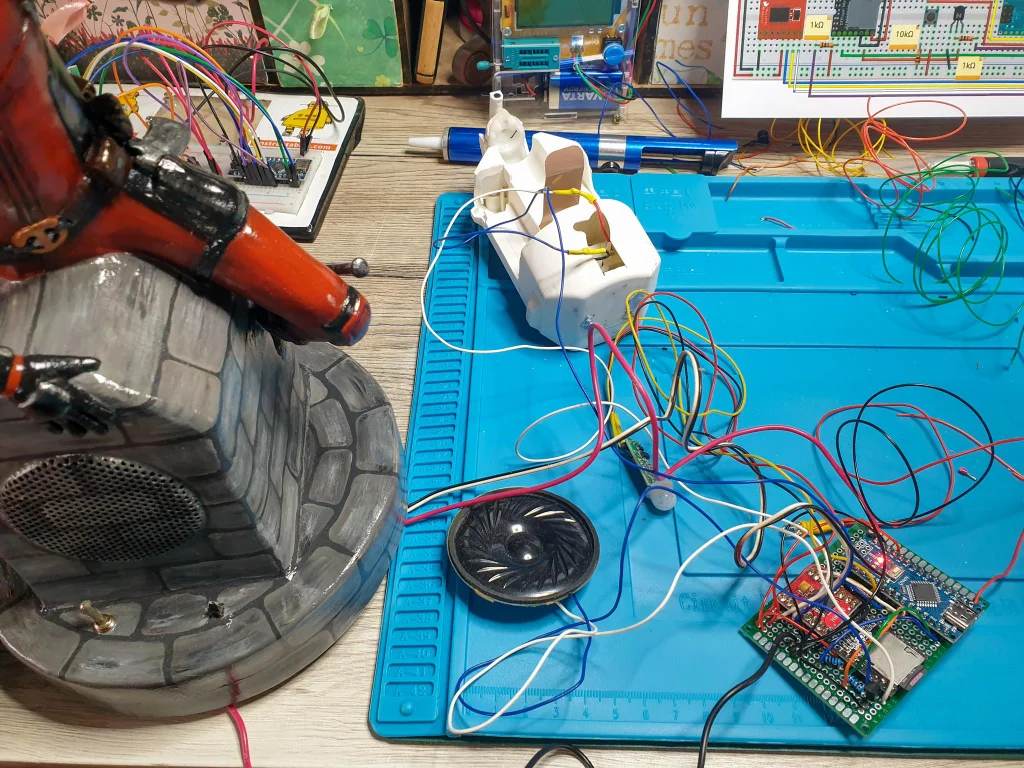
Step 18: Wiring and Testing


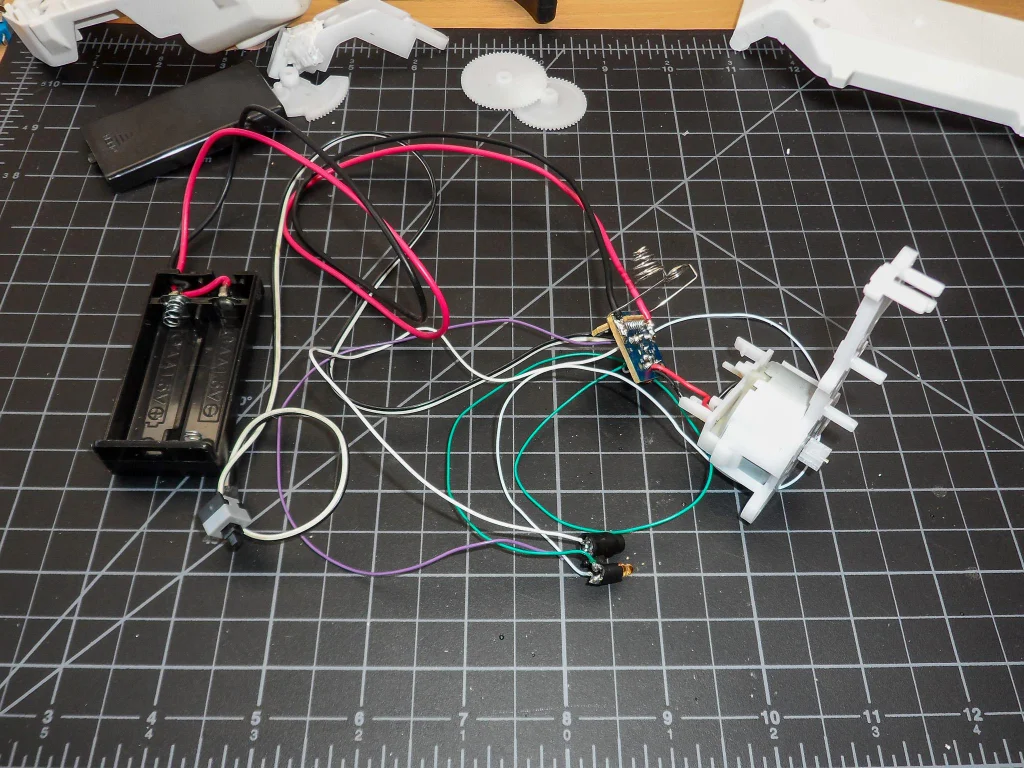
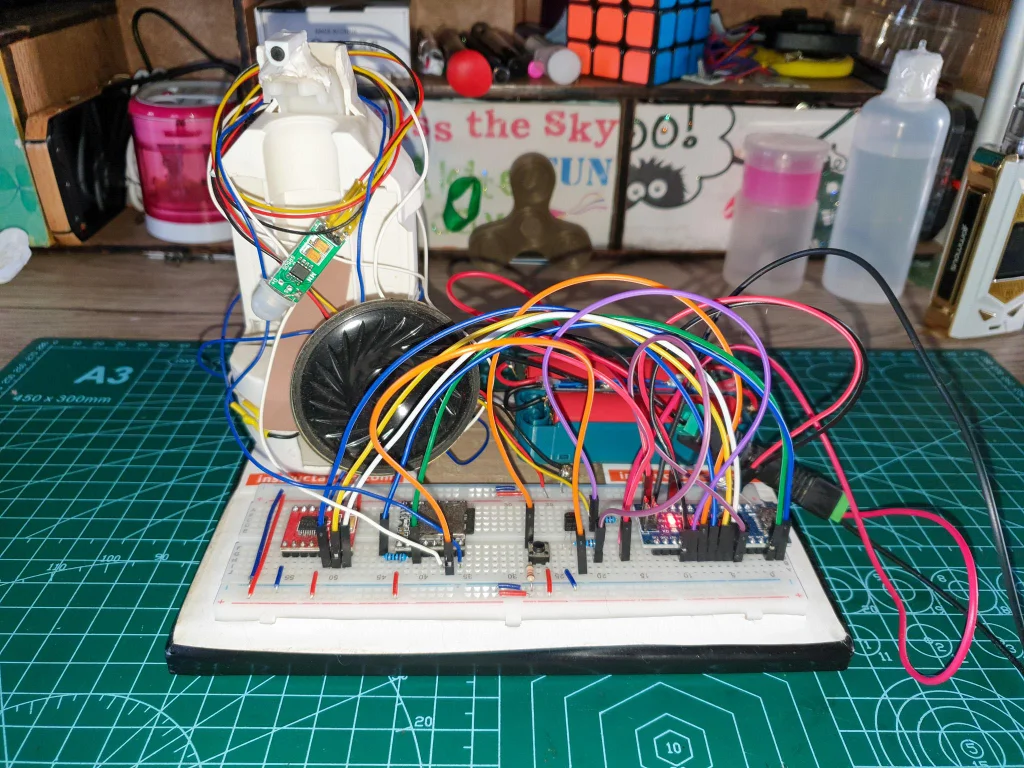
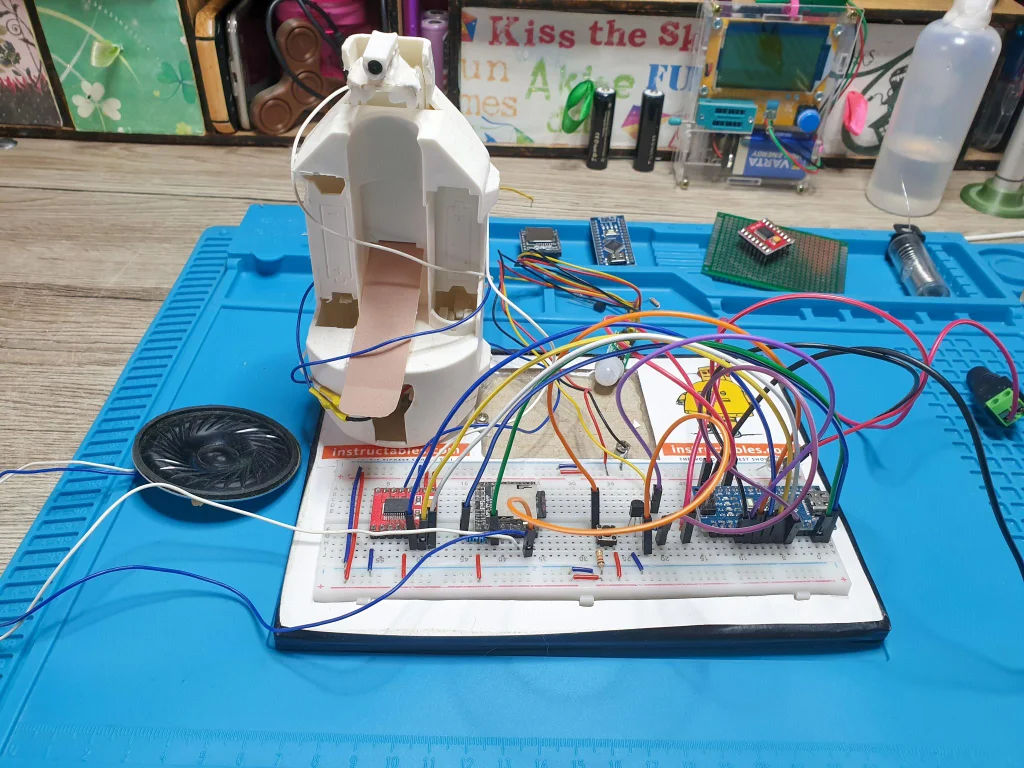
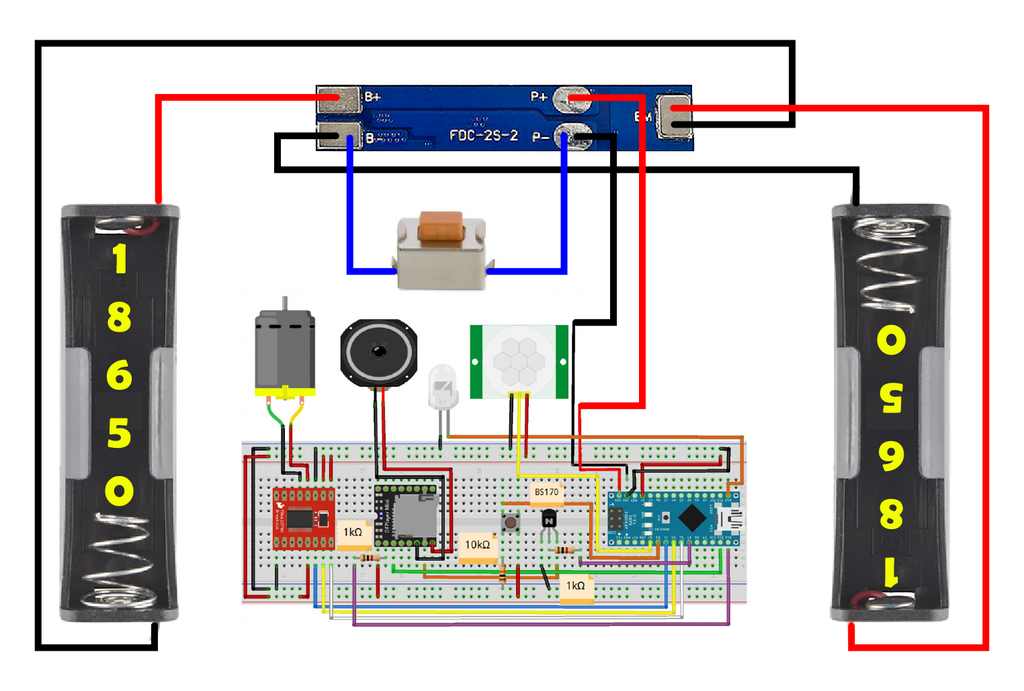
With the Arduino code ready and the components selected, it was time to bring everything together by connecting the electronics.
Following the diagram I had created, I connected all the electronic components. At this point, the air freshener no longer had its original circuit board inside. The two wires coming out of the air freshener were directly connected to the motor, and the Arduino took care of controlling it.
Once everything was wired up, I tested the system to ensure that it was working as intended. This involved checking the connections, ensuring the motor activated when triggered, and verifying that the DFPlayer played the correct sounds in sequence.
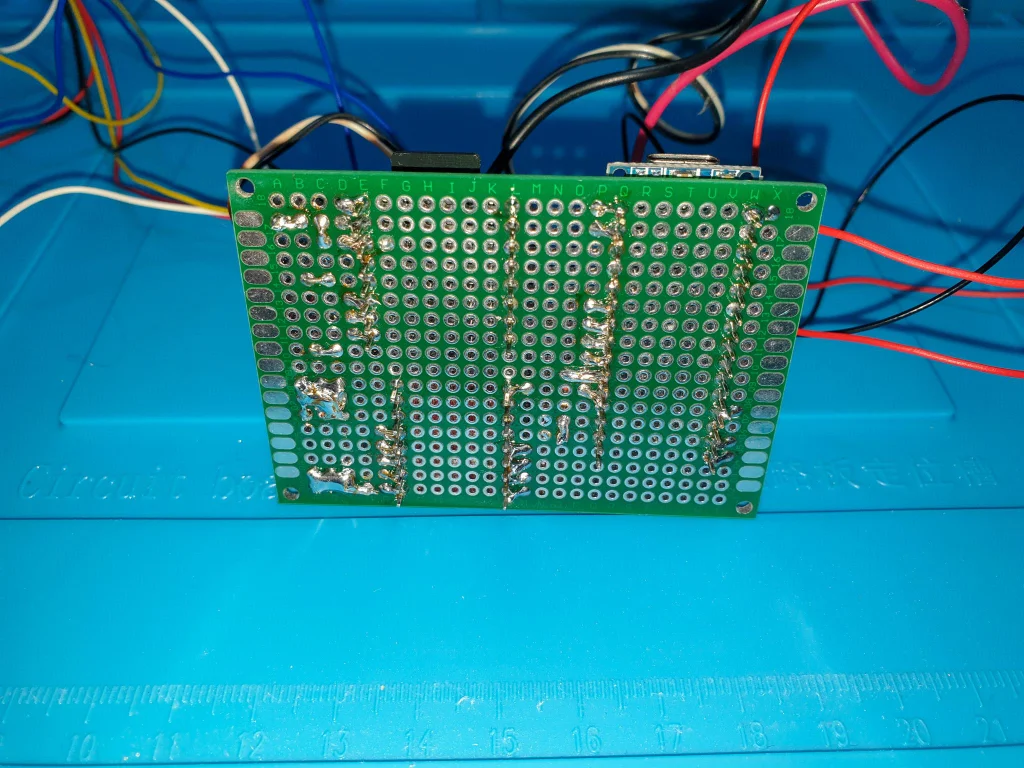
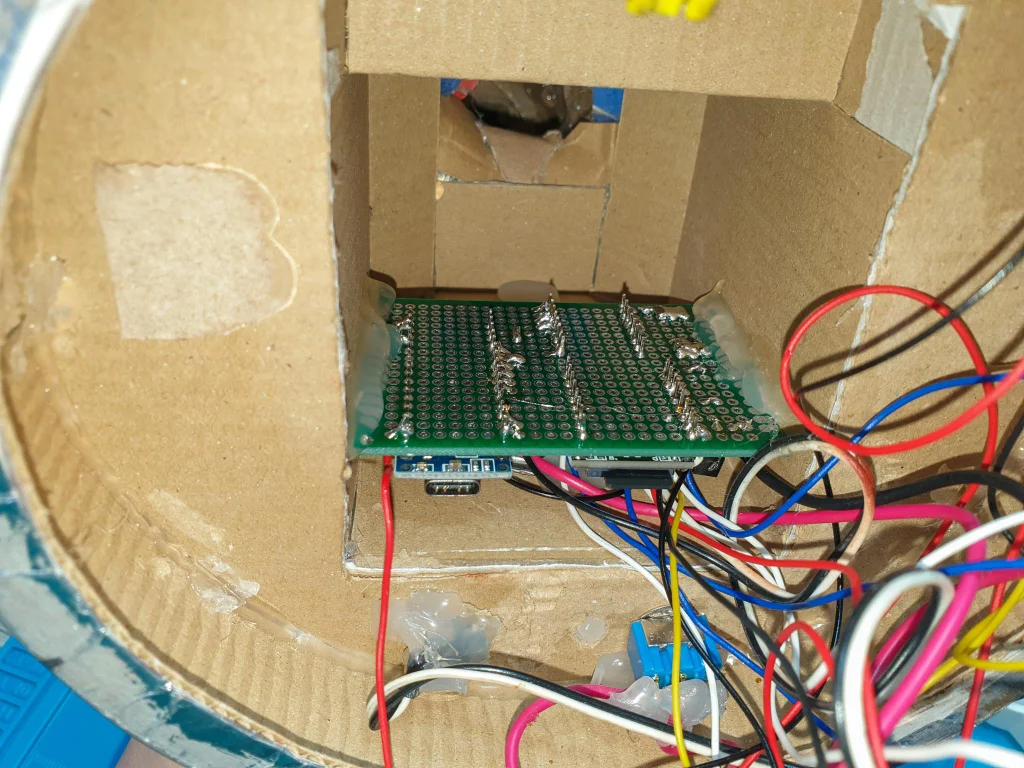
After confirming that all the electronics were functioning correctly, I proceeded to solder all the components onto a prototype board. Once the soldering was complete, I tested the system again to make sure everything was still working as expected.
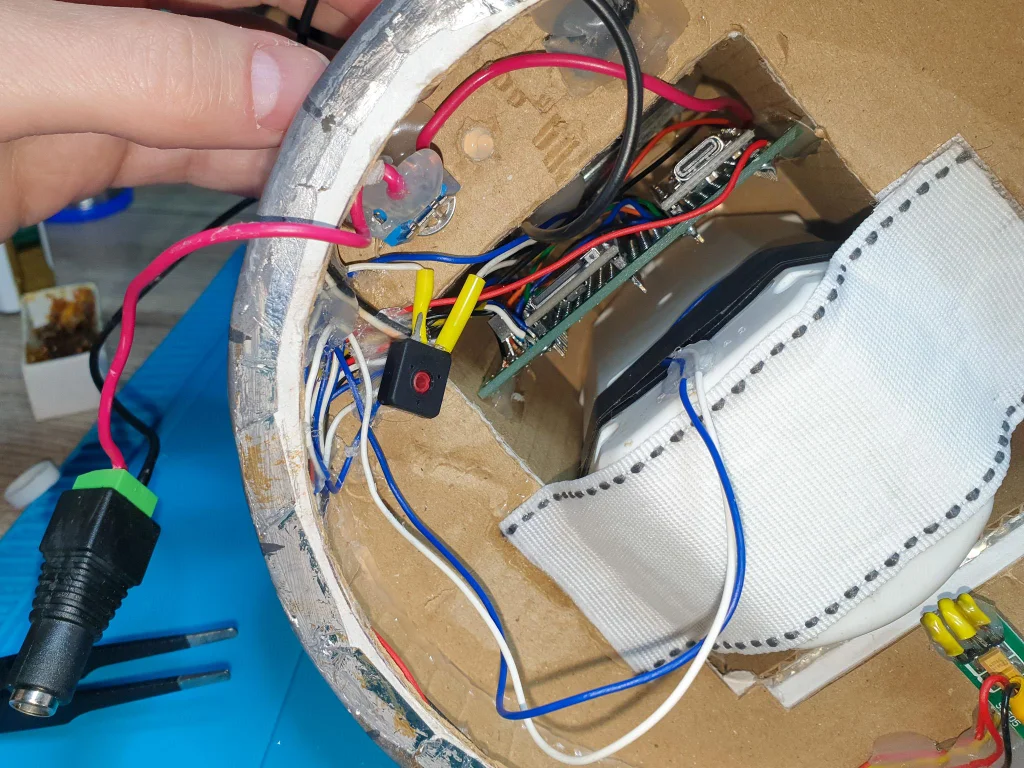
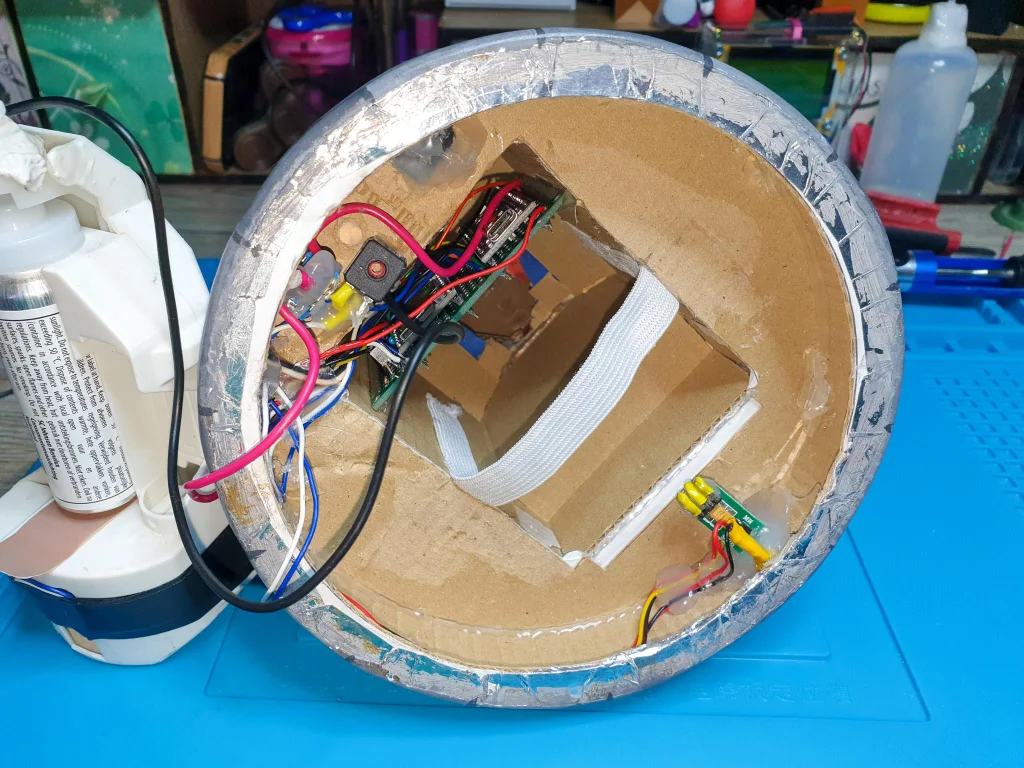
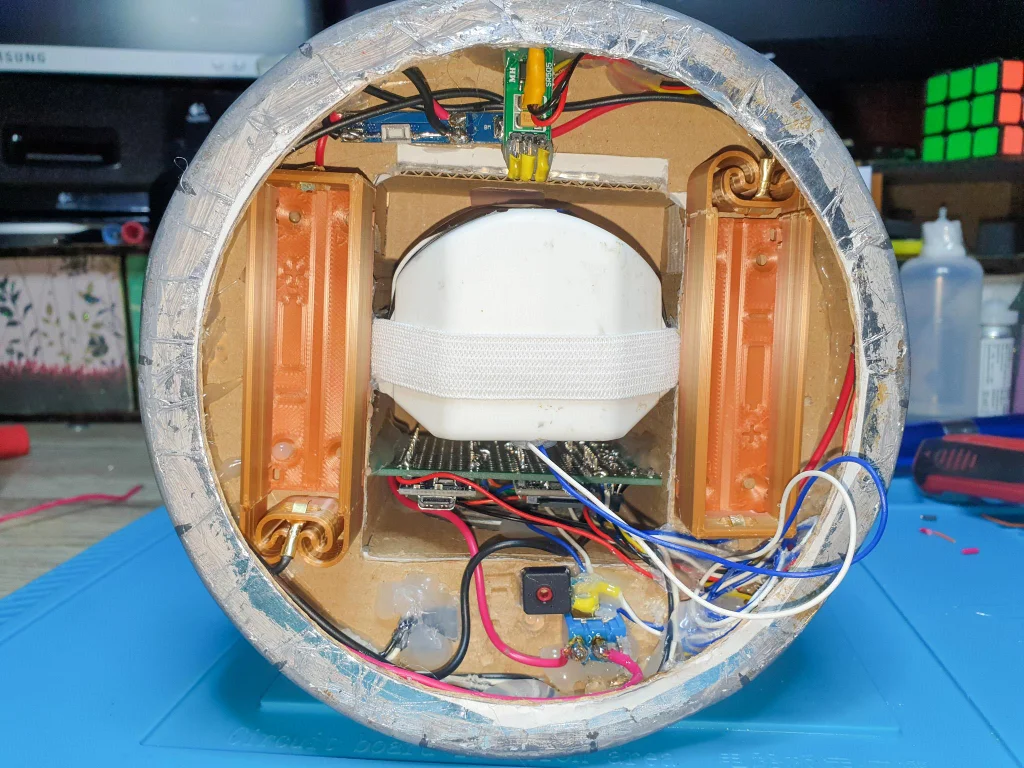
Step 19: Gluing and Positioning


Using hot glue, I secured the speaker, LED, and PIR sensor into their respective openings in the base. Next, I positioned the prototype board inside the base in such a way that both the Arduino and the SD card were readily accessible. This positioning would make it easy to update the code or swap out the SD card if I wanted to add more sounds in the future. Once the prototype board was in the perfect spot, I secured it with hot glue, making sure it wouldn’t budge.
To keep the wiring neat and avoid any accidental disconnections, I glued the wires along the side of the base, leaving enough slack on the air freshener wires so that it could be easily pulled out for refills.
Around this time, I realised that having control over the volume without needing to tweak the code would be a great addition. To make this possible, I soldered a 1KΩ potentiometer onto the positive wire of the speaker. This allowed for easy volume adjustment by simply turning the potentiometer with a screwdriver. Once the potentiometer was soldered in place, I glued it into the base, making sure it was accessible but not in the way.
To keep the air freshener securely in place while still allowing for easy removal, I hot-glued a piece of elastic band into the base. The elastic band held the air freshener snugly, ensuring it wouldn’t move around during use, but still allowed it to be pulled out when it needed to be refilled.
Step 20: Batteries


Step 21: Final Touches


Final Thoughts


First Prize in the
Plastics Contest